Thursday, November 29, 2018

Workshop Cabinets

I had a couple of old kitchen cabinets which I removed from the area where I put my workbench, and I wanted to install them at the other side of the basement. Unfortunately the front bedroom heating duct was in the way.


So I cut off the duct with my screaming wheel of death. There, that's much better.


Now I can put the cabinets exactly where I wanted to.


Framed out the recess below the smaller cabinet


Filled it in with some scrap pieces of what we used to call white "Conte Board" back in the day. I'm going to use this recess for recharging power tools/batteries.


Not a bad half-day's work, even if I do say so myself.


Finished up by replacing the original heating duct with some modern flexible, better insulated material.

Thursday, November 22, 2018

A Bigger Space and a Bigger Sink

I was very happy with my workshop, but there still scope for improvement. This is how the workshop sink area looked a few weeks after we moved in -  cabinets in an "L" shape and the fluorescent lights still shining bright.


Fast forward about a year, and the new LED lighting and electrical outlets have been installed. I also built a mobile work table for projects that need more space. I wanted to change around the counter at the left of the sink to make a larger space in the main workshop area.


Started by disconnecting the old two-bowl enamel/cast iron sink. There wasn't really anything wrong with it, but the double bowl did not lend itself to cleaning our large paint roller tray!


Then removed the "L"-shaped counter top.


This is where it got a little bit trickier. I had to take the short piece of the "L" and reduce it from three cabinets wide to two and then re-install it.


Re-installed the long section of the contertop and then mitered the short section to fit next to it while retaining all the edging. It was about 3/4 of an inch shorter than would have been ideal.


I had to fill the notch with a tiny off-cut.


Test fitted the sink - I deliberately bought a replacement of the same size so it dropped straight in to the original opening. Then I took it back out and installed it with the proper caulking and fasteners.


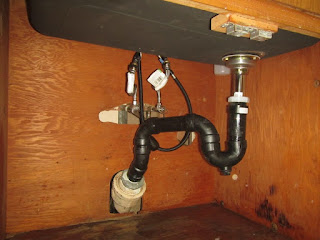
Installed the sink drain and faucet.


Connected the existing supply and waste lines to my new sink. This was actually really easy, even though I've never done glue-together plumbing before.


A very adequate outcome:


Thursday, November 15, 2018

Setting Up the Workshop

With the basement out of the way, we were all done with urgent projects. Time to do something about my workshop. It would be no exaggeration to say that the basement/workshop space was a huge part of why we chose this particular house. Well, that and the double garage...!

The PO had left a bunch of old kitchen cabinets on the back wall in the workshop, and on the other side was the old L-shaped kitchen countertop and sink.


The other side of the was basement was basically an open space when we first moved in, and we quickly filled it up with boxes...


My first attempt was to park my workbench and table saw in front of the cabinets. I had to take one cabinet off the wall so I could fit the mire saw on top of the table saw.


Samuel Bear put his workbench and desk on the other side of the workshop


This was pretty much how the workshop stayed for at least six months until I got around to replacing the crappy florescent strip lights with (a lot more) modern LED strip lights.

Two over the workbench and table saw

Three in the main workshop area and another over the sink

Another one over the grinder/drill press bench

While I was doing the lighting I also upgraded to outlets in the workshop. I was lucky that the sub-panel had plenty of space for extra circuit breakers so I put the table saw on its own breaker - no more flickering lights when the blade chomps on a particularly tough bit of wood!


I installed an (almost) 8' x 4' sheet of peg board above the workbench at the expense of the central cabinet.


Made sure to fit it around the new outlets.


Spent ages hanging tools on the peg board. I ended up buying a second set of wrenches and screwdrivers so I can keep the other set in the garage.


This is how the other side of the workshop looked up until this point.


Installed two sheets of 0.5 inch plywood to make a solid surface.


Parked some shelving units in front of the panels.


Installed my extensive collection of parts drawers


Filled the shelves up with all the usual workshop-related junk. Bring on the next project!

Thursday, November 8, 2018

Basement Remodel

So, the reason for pressing ahead with bricking up the fireplace was so we could concentrate our efforts on the main living area...however, it became apparent, that what we really needed was a functioning living space where we could "be at home." So we switched our attention to the basement. Once we got going on this project, we realized it made sense to do the adjacent gym/guest bedroom and the guest bathroom at the same time. And the staircase.

A quick reminder of how it looked with staging....yuk!


The whole basement was a dumping ground for boxes and other crap for weeks after we moved in....


It took until the end of 2017 for the basement to be in a usable state.


Got the gym set up....


Moved the music studio into the gym...


As previously mentioned, we didn't bother taking photos of the re-painting, but installing the carpet tiles was worth getting the camera out for.


Building and installing the TV audiovisual cabinet was testing to say the least. This is how it looked after we got it filled up.


View of the basement looking towards the yard.


We painted the "gym" in the same color and extended the carpet tiles


And same again in the bathroom plus the vanity cabinet got a makeover.


Onto the noisy stairs with their unmatched handrails.


Painted the handrail and installed some padding at the treads with my new electric staple gun.


Fitted the new stair carpets with the same staple gun.


We had a volunteer test the carpet before we walked down it ourselves....