Monday, May 27, 2019

Stump Grrrrinder Day

Step back to our Christmas Vacation 2018, and as most people don't do at this time of year, we went out and rented a stump grinder to deal with the five (5) foot diameter stump we inherited at the side of the house. We have big plans for this area and they don't involve any dead wood. I should have got my camera out before we started, but I was too eager to get cracking with my new toy!


We also had a couple of hawthorn trees which were crowding each other out, so we removed one of them and then ran the sump grinder over the top of that one too.


Watch this space for developments!

Monday, May 20, 2019

Maps

I have a map of the USA that I've owned since the summer of 1999, and sine then its been hung on the wall in more houses than I care to remember. In around 2005 I bought a cheap frame for the map and when the frame collapsed a few years later, I glued it back together. Over the years I added my state quarters collection to the plexi-glass with first putty and later epoxy. The map had character in spades, but really it was too tatty to go on the wall in our new office.


I started off with some of the same black walnut we used for the desk tops, and I cut a rebate on the router.


The rebated pieces were mitered to make the basic frame and the cross-members were made by cutting rebates on both sides of the material and rabbiting both ends.


The frame was assembled with clamps....


....and the corners and joints were v-nailed with a manual underpinner.


The assembled frame was finished with the same flat varnish as the desk tops and left to cure for a mind numbing twenty-one (21) days.


I made some cork boards to go on either side of the map. I used some cork tiles I found on the interwebs and mounted them onto some scrap pieces of ¼ inch plywood with contact adhesive.


Here's how the map came out after assembly:


It looks better on the office wall than it does in this photograph.


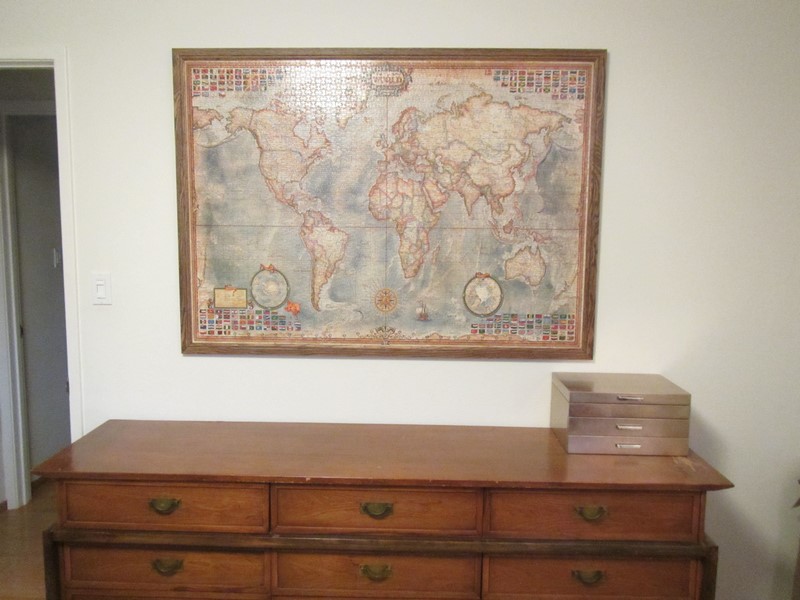
At the same time, I also knocked out frame for my World Map. This map is actually a 4000 piece jigsaw puzzle which we put together about six months before we moved house - after the puzzle was completed it was carefully divided into quadrants and large pieces of sticky paper were applied to the back. Two years later and it needed a frame, which I wanted to make out of oak. This time the molding was a bit more intricate and required three passes through the router table.


The frame was assembled in the same way, and then stained with, ironically, dark walnut, to achieve a tone similar to the dresser it will hang above. The stained frame was also finished with the same flat varnish and left alone for twenty-one (21) days.


Came out pretty nice:

Sunday, May 12, 2019

Dining Table Re-finish

It's been a busy few months - lots of different projects going on which either haven't been finished enough to write about, or in most cases, I haven't had time to write about. Our dining table is one of the former. It had an irritating V-grove around the perimeter, and there were a number of places were the veneer was loose or damaged. One Sunday morning over breakfast I started picking at the loose veneer with a craft knife.

I had to stop because it was all loose.

Late on I filled the grooves with automotive bondo and sanded the table flat. I think I forget to photograph that step. The footrest has always been loose while we've owned the table, so I took the time to re-glue it as best I could. I had to get creative with some of the clamps.


We bought a full 8' x 4' sheet of good quality oak veneer and applied it with contact cement and then I had my assistant flatten it all down with a special tool.


After suitable curing time, we trimmed round the edge with the router and the table was heaved out on to the deck and sanded down to 400 grit with my new favorite tool, by my always favorite tool operator.


We applied gel stain and wiped it down pretty quickly afterwards. Credit to the folks at MacBeath Hardwood for picking out the perfect veneer/stain combination.


We finished the table in the same way as the Walnut Desktops - three coats of flat varnish, which had a cure time of twenty-one (21) days.