I mentioned a few posts ago that I'm finished working on the front yard other than providing the occasional bit of extra muscle (!) My next project was supposed to be the deck over the garage; water is leaking into the garage below the deck and I need to make it stop.
But here's the thing: we're having a mega BBQ for all the BAMA folks in about six weeks, so I can't start ripping the deck apart until after that. And, with that event in mind, it makes sense to re-install the railings at the stairs.
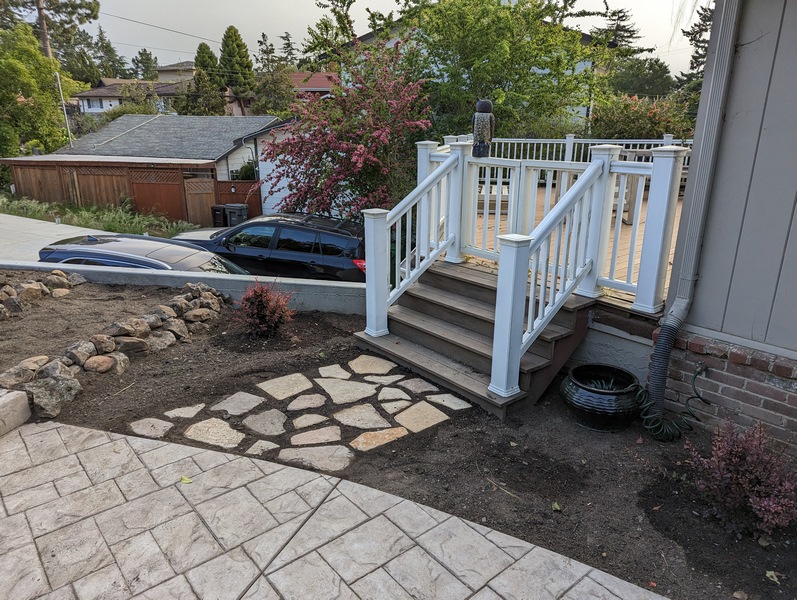
I wasn't planning on doing this until after the deck/roof remodel because the handrails will be in the way of lifting the deck boards, but whatever....they had to be cut down and re-fitted sometime, and after that there were just a few screws to install.
A few days later Amy Sheep planted some ground cover at the path we made a few weeks ago. It should take about a year for the plants to completely take over this area.
So almost done, except there was just one other thing I wanted to look at. I noticed a while back that the trim at the front of the house, where the siding meets the brickwork, was moisture damaged in a few places. I wanted to dig out the worse bits and fill the gaps with bondo. But....a few minutes poking around revealed I would be better off replacing all the trim. I didn't feel at all like doing this at the time, because I had a carburetor to put back together.
A couple of weeks later I went out on Saturday morning and broke out all the rotted trim. The trim was nailed on behind the siding, so I couldn't get to any of the nails. I used a hammer and chisel to split the wood into narrow strips, and it helped that the trim was mostly rotten.
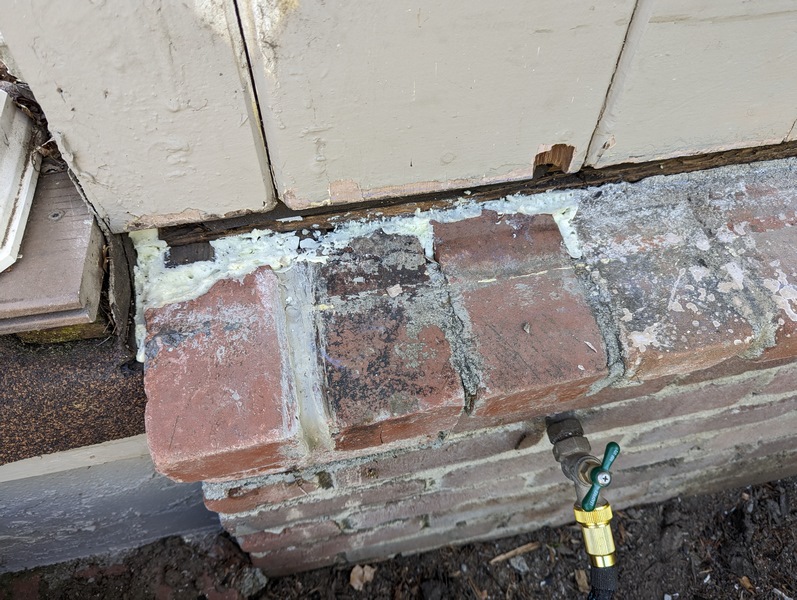
One of the bricks was either loose or I popped it out, and there was a pretty big gap at the left side which should have been filled with mortar.
I used some
Loctite PL 500 landscape adhesive to stick the brick back in place - I was sure to make it messy so that it matched the original mortar!
Filled the gap with some expandable foam:
I picked up a couple of nice 8 foot redwood 2" x 6" boards to make the replacement trim from. I was careful to pick out the straightest boards I could find. And then I left them in the car for two days to bake in the sun. Fortunately, they were still useable, if a little twisted.
The trim needs to be about 1.25" x 2.75". I'm using nominal lumber, so the true dimensions are 1.5" x 5.5. Cutting the timber perfectly in half gives four boards that measure pretty close to 1.5" x 2.75".
I need to get rid of about 1/4 inch of material from each board, which provided a perfect opportunity to use my bench top planer for the first time! I got the planer at the same time as the band saw, jointer and the dust collector, but until now it has been sitting unloved in the corner...
I was able to connect the planer to the duct extractor with a bit of improvisation, which was very beneficial.
The brickwork that the trim will sit on slopes away from the house at about five degrees. I cut a 5 degree bevel on the rear edge of the replacement trim, and a 10 degree bevel on the front edge. The upper front edge was rounded off with the hand router and a chamfering bit, although it is hard to see that in the photo below.
I've always hated sanding, ever since I started "doing woodwork" and even power tools haven't helped. I milled four pieces of trim, but I really only needed three lengths, so the fourth piece never got sanded.
I gave the finished pieces a quick coat of primer, and then it was time to head inside for lunch.
When I came back outside the primer was dry. I started by trimming off the excess expandable foam:
To install the replacement trim with nails or screws would be difficult, since I can't get behind the siding, so I'm using
Lexel. This is a colorless sealant which sticks pretty much anything to anything else and has been a revolution in the construction industry.
I mitered the butt joints between sections of the trim, and I did paint primer on the ends, even though it doesn't look like it in the following picture.
All done!
The next step was to cut out all the rotten sections on the siding...
...and apply bondo (aka automotive body filler). The worst bits required several applications.
Painted primer on the bondo and at the lower edge of the siding where the paint had been scrapped off, and then the last step was to caulk the gaps where the trim meets the siding and the brickwork. I'm using
Big Stretch which comes from the same manufacture as Lexel and is a modern superior quality caulk.
The next photo was taken a few days later after the repaired areas have had two coats of house color paint
and the downspouts have been re-installed.
This was the first project I've done since I got my
Perkins Brothers toolbelt. This tool belt is custom designed to hold one of every tool you need. If you're not familiar, the Perkins Brothers have probably the best housing building channel on
youtube; well worth checking out!


%20%5B800x600%5D.jpg)