At the end of the
last post, we had finished installing irrigation lines, and the system was leak proof....apart from at the valves. Still, no reason not to shovel all the dirt back into the trenches, so that is what I had Amy Sheep do while I mooched about taking photos and enjoying another nice morning.
All done...
I think I said we were all done installing pipe. Turns out we weren't. It is not really obvious in the above photo, but each of the pipes we installed is located uphill from the area it will irrigate. Putting the incoming water at the bottom of the slope leads to a significant loss of pressure at the top.
We know this because the pipe which feeds our artichoke bed is so configured. The plants at the top of the hill did not get enough water last year and bore little fruit. Since we had all the tools and materials on hand, I had Amy set to work on digging a suitable trench inside the fence for our uphill extension:

I installed the additional section of 3/4 inch diameter schedule 40 PVC pipe and connected it to the existing incoming line.
Fast forward two days, and we tested the new pipe for leaks, and, having not found any, I watched while Amy filled the trench.

Re-wind two days, and it's time to eliminate the leaks at the control valves and build an access box. This is the set up before the pressure regulator was added to the incoming line:
I could not find a regulator that would couple easily to 3/4 inch PVC, so I bought one that couples to 3/4 inch PEX, and then used two (2) sharkbite PEX-to-PVC fittings. I had to cut about a foot out of the existing PVC to accept this setup. Once the valve was installed, and the outgoing pressure dialed down, I was relived to find the all the leaks had...dried up!
Close up after installation:
I would like to cover the valves with the two access boxes that came with the house...
..but they are much too small to bridge across the valve manifold and the incoming pipes:
A somewhat complex solution was to build an extended framework to support the two boxes. The structure stands on a parallel pair of 4" x 4" skids and is entirely construed from treated lumber. I do not need to access the PVC pipes; I just need to make sure to build around them.
This is the look after both boxes have been mounted, the pipes covered with a 2" x 12" plank and the last bit of excess dirt has been shoveled back around the platform. Ultimately just a few each inches of each box will protrude above the dirt.
The pressure regulator and the first two valves can be accessed from the first box...
...and the other valves are accessible from the second box.
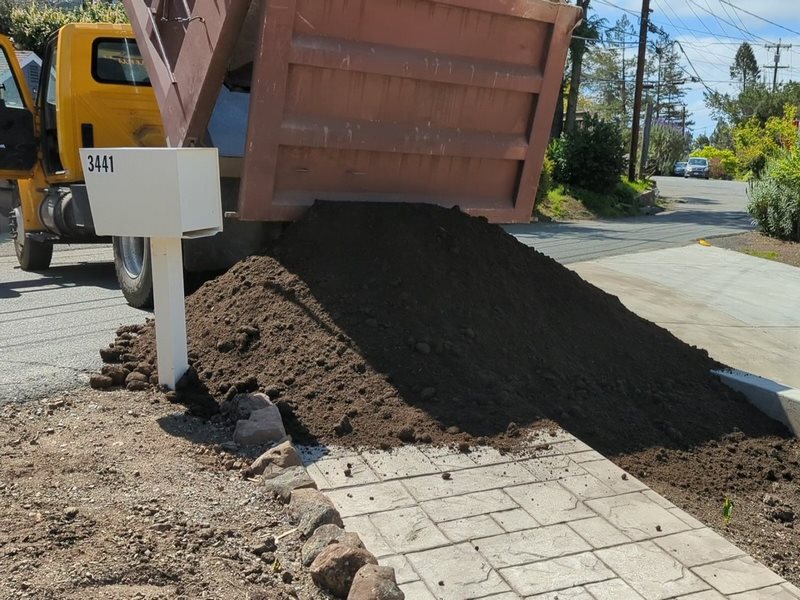
That might sound like a very successful installation, and it was. In fact, we were just standing around congratulating ourselves, when I big truck showed up and dumped six (6) cubic yards of topsoil next to our mailbox. Just looking at the size of the pile was enough to send me scamper inside to put the kettle on!
After tea, the first portion of the dirt was spread out in front of the house...
After another tea break, and another round of shoveling and barrowing...
///the rest of it went behind the retailing wall:
We need a few more cubic yards for the other side of the path....not to mention around the valve boxes.
You might think that would be enough yard work for one weekend, but we have been desperate for some nice weather over the last few months and we really keen to keep going. The next thing on the to-do list was to prepare the raised beds for planting.
The very first job was hack back the pride of madeira at the top of this section of the yard. This is after we filled about six sacks with dead limbs and branches which were encroaching on the walkway between the retaining wall and the upper bed:
You only get two years out of strawberries apparently, so we had to dig up all these plants.
All gone, and the bed has been topped off with three big bags of chicken $&@#!
Same with the lower bed, and Amy Sheep has added a few more new plants to this one:
We also tidied died up the lower slope. Most of the plants we want to get for the yard are not ready yet because the weather has been so terrible.
We still need to get another load of topsoil delivered, and I may well need to provide muscle with some of the planting, but my involvement in the front central yard remodel is essentially over. This is good news for a number of reasons, some of which are that I can start using my new woodworking equipment to build some furniture, or I could start work on fixing the deck above the garage, so it doesn't leak into the garage and table saw room.
But the main immediate advantage of this situation is I can clean up all the wheelbarrows, garden tools and plumbing parts that have been littering up the garage for the last few months. This is the floor after I got rid of all of the above plus some other unrelated crap.
After that I swept up the big chunks, and then vacuumed the floor. Then I put the Mustang on the driveway and vacuumed the carpet. Just starting up the '68 was enough to confirm what I thought I noticed the last time I drove it: the car had a massive exhaust leak. I mean the car is supposed to be loud, but not ear splitting; I had flowmaster 50's fitted so I could stand to drive it for long periods without going all mutt and jeff.
It turns out I was missing several bolts where the exhaust connects to the headers on both sides! The photo below was taken after I replaced the bolts and installed them with blue loctite. The car was running a lot more quietly when I restarted it. I have a lot of little things to do to the car this year, mainly niggly little things which were never finished or have developed since I started driving the car again last year.
To be continued...