Saturday, September 30, 2023

Fixin' The Deck Part 3

It's the Thursday before Labor Day. The work I did in the morning session was noted here, but now it's dusk and I can I set up the laser level on the roof. The green laser is very difficult to see in bright sunlight.


The shape of the deck is such that there is no location where the laser level can hit every bit of the perimeter. To cope with this, I put a small piece of blue tape on the corner of the wall and made a line where the laser hits the tape. This is defined as "zero level".


I can then move the laser level to a different position on the roof and bring it up or down as needed to establish the same zero level. 


I made an improvised measuring stick from a piece of 1"x3". I established "zero level" at the stick in the same place as the level. I didn't bother figuring out what "zero level" actually is since it is arbitrary. I marked graduations of 1/4 inch above and below zero, 
 

With this tool, I can take a measurement relative to zero height anywhere on the roof. I used this data to plot the height of the roof at a range of points across the deck. And the results show that the roof does not slope in any direction consistently...grrr....


Several weeks have passed since the above measurements were taken, and I am not really any closer to an action plan. However, it is clear that I will have to remove at least some of the roof covering and address the soft spots in the surface. To do this I need to get rid of the perimeter railing. The first step is to remove the top caps from each post and drop the trim pieces at the bottom. Each section of the railings can then be removed. 


And, after much labor, transferred to the back yard for storage:


This leaves just the sleeves and bottom caps to remove:


I discovered the posts are attached to the deck with brackets, rather than lapped into the supporting structure. No wonder most of them wobble more than a trio of weebles on the waltzers!


I started lifting the roofing material outside the double doors. This area is sheltered from the elements, so it seemed like a good spot to start. 


I had to cut the roofing material at the junction with the stucco, but otherwise it was just like rolling back a carpet because the material has not been installed correctly. The idea with this material is that the tar at the underside is melted with a propane torch at install; this sticks the material to the plywood or OSB sheathing. (Note: this type of roofing is known as "torch down" or "rolled roof". An experienced installer can heat the rolled material with a torch and unwind the roll in a continuous movement). In this instance, the material has just been rolled out on top of a layer of tar paper; seams in the roofing material have been overlapped and sealed with a torch, so it should be waterproof, and probably would be fine if there was any kind of consistent slope.


Peeling back the first little bit of tar paper revealed my some very stained plywood. Since this is the one area of the deck which is actually covered with a roof, it was not encouraging. It seems pretty clear that I will have to lift or roll back every bit if the roof covering and examine the plywood, and then figure out how much of it needs to be replaced. 


Before I could lift much more of the roof covering I needed to get the deck boards out of the way. So I had to put the project on hold until a suitable labor force was in town. A couple of weeks later it was game on. It took Any Sheep and Quinn Sheep up on the deck, me down on the back patio, and several tea breaks, to relocate the deck boards to the back yard.


After that, I spent longer than I care to remember removing all the fasteners from the supporting timbers...


And put that into a neat pile:


Now I have a blank canvas:


To be continued.....

Monday, September 25, 2023

The Joy of Tools

I grew up doing DIY around the house with my Dad. It's something we still do, and enjoy, if we get the chance. My earliest DIY memory is wiring an MK plug in my parents living room when I was 3ish. MK plugs had some unique fasteners that were a joy to install. The reason I can remember this is that I was so keen to complete the task that I would not stop to go to the bathroom...with the inevitable result!

My Dad was very well trained in DIY by his father in-law, Grandad G to me, and the man who taught me how to lay concrete, amongst many other things. My grandfather was a very talented man and had an impressive collection of tools in his garage. As I understand it, he spent his working life as a joiner, but he could have been a cabinet maker. A number of pieces of his furniture remain in the family today including the money box below which was made for my mother and was gifted to Samuel Sheep when he was little.

Sometime after my Grandad G passed away, I was fortunate enough to inherit his tool chest (right in next photo). I made a few modifications to it like installing modern latches, which I now regret, but I did also use it to take my tools to a jobsite several times in the late 90s. One of those jobs was building record racks in the now legendary Shake Some Action store in Croydon. In April 2008 I brought the tool chest over to America. At the time United were charging a flat rate of seventy dollars per bag for excess baggage, so I took advantage and exported a second tool chest at the same time. I've since been badly burned by turning up at the airport with a few extra bags, so I wouldn't recommend it.


The second tool chest (left in previous photo) came from my father's Uncle Herbert. Until recently I thought of Herbert's box as the poor relation, simply because it was an off-the shelf toolbox rather than being hand made. Uncle Herbert was a decent DIY-er; he could fix old kettles and toasters and TV sets and probably anything electrical, and he kept up with technology throughout his life. He was the first person I knew who got a microwave oven, and he had a VCR under his tellybox right at the start of the 80s. But he wasn't a carpenter, and it probably would never have occurred to him to build his own tool chest.

At the time of import both tool chests were, rather obviously, packed with tools. I didn't bring any power tools, but I did bring every hand tool I owned, very few of which were actually bought from shops. Mostly they were old tools I had been given or had acquired. My Dad's friend John District was a great source of tools, and also gave me a lot of encouragement when I was getting going building my own collection. When I was given Uncle Herbert's toolbox, it came with a fair few tools as well.

In April 2008, when I was unpacking all these tools and imagining what I might do with them in future, I had been estranged from the collection for quite some time - more than a decade had been frittered away on one university campus or another - but now I was a homeowner, and I could not wait to get going. At the time I had just finished building two huge work benches in my garage:


One of these benches is in my present workshop, and the other is in the garage. Both the tool chests are also in my workshop. I was recently looking at both the chests when I either noticed for the first time or rediscovered that Uncle Herbert's tool chest was actually a tool kit. The big label on the front which declares "GTL Tool Chest and Home Repairing Outfit" kind of gives this away! 


I did a bit of hunting around on the interwebs, and I found this advert from the November 1934 issue of Practical Mechanics:


A bit more hunting, and I found a few pictures of parts of the complete tool set. Funny thing is, I think I probably have about half of these tools. I definitely have the mallet, the hand plane, screwdrivers, the marking gauge and the tri square....and the mallet and tri square get used all the time! 


Most recently I have been working on restoring several of Uncle Herbert's old tools. Stay tuned for further developments!

Monday, September 18, 2023

Workshop Re-Org

It's a well-known fact that the Eiffel Tower can be six inches (15 cm) taller during the summer. As the mostly iron structure heats up, the particles gain kinetic energy and expand.

It's almost as well known that you don't really plan the layout of your workshop - I mean, you can try, but whatever you do the final layout will evolve all by itself. If there ever is a "final" layout. The recent walnut TV console project highlighted a couple of things in the shop that could be improved, with a little bit of time and effort.

The first issue is that the jointer needs to be connected to the dust collection system. Since I got the thickness planer up and running, the jointer is the only "big" tool that doesn't have the dust sucked out of it on demand. 


The other problem was the miter saw. The workshop is basically an L-shaped space where the main work bench is located at one end of the "L" and the cabinet saw is at the opposite end. Which works well. But I found that having the miter saw right next to the cabinet saw was not ideal - the miter saw gets used a lot, so it needs to be in the center of the workshop. It does feel a bit crass to be moaning about the workshop being so big that I waste time walking between tools, but that is the luxurious position of today. 

This situation was resolved by swapping over the jointer and the miter saw. There was no 220 V outlet in this area at the time the jointer was parked there....


But a little bit of tweaking the existing writing and adding a new outlet was all that was needed to bring power.


I'm very happy with the dust collector - it works really well, and the suction can be switched on or off remotely. Still, it has its limitations, one of which is that there are only two (2) inputs. One of these goes to the cabinet saw, and the other one switches between the band saw and the thickness planer. Plus, some of the connectors are taped together, which looks a bit amateurish. 


I invested in a few connectors, three (3) metal blast gates, a "Y" duct adapter, and another section of flexible ducting. 


After assembly of these components the dust collector now has three (3) inputs, which are operated independently by opening one blast gate and closing the other two:


The two ducts which connect to the "Y" fitting serve the cabinet saw and the table saw and are always connected. The duct which goes to the jointer runs across the floor at this point; I may re-route this later if all the big tools stay where they are.


The third duct can be switched between the thickness planar and the band saw; I still need the proper 2.5" to 4.0" connector for the planar; I'm getting by with tape for now.

The miter saw has been parked on a crappy cart where the jointer used to be. I plan to use the shop vacuum for dust collection on this tool. I plan to build a proper miter saw station in this area if it does become the "final" location. This has already proved a much more convenient location. 

Wednesday, September 13, 2023

Mike Sultana

Mike Sultana, or Uncle Mike, as I used to call him, was my Dad's longest/oldest friend; they were mates from before I was born. I grew up in the 70's, when even the most transient of my parents' friends got the "uncle" and "aunt" titles, but Mike Sultana was different. He really was like an uncle to me in the ways that matter when you're young. 

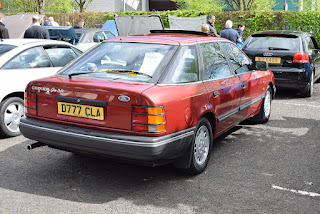
Uncle Mike passed away a couple of months ago. I could start by mentioning the obvious things like his ginger beard, his easy-going, generous nature or even the square-faced watch he used to wear in the '80s. But really, like everything else in Papa Sheep world, it comes down to cars. The first car Uncle Mike owned in my lifetime was a 1972 Hillman Hunter DL Estate. A pretty swish, well-built car for its time, if a little visually unattractive.


The above photo was actually snapped right before a camping trip, and if you look closely, you can see a monopoly board game and a "Camping Site Guide" have been hurriedly flung into the car. There is also a "Europe via Dover" sticker in the bottom left corner of the rear window to complement the "GB" badge on the other side of the tailgate; this was at a time when going to a foreign country was a big deal.

I can't remember the model of car that came straight after the Hillman, but it was a dark blue sedan of some kind, and it was not around long. One memory of Mike which I don't imagine would stand out fondly for anyone else concerns this car and it goes like this:

It was a latish Saturday morning in the mid- to late 70s, and I was at home with my parents when the phone rang. This was back when people had landlines and used to call each other out of the blue. This time it was Uncle Mike on the phone. After my Dad hung up I think maybe he asked me if I wanted to come and "do a favor for Mike" or maybe my Mum told him to "take at least one of the kids with you." Either way, my Dad fired up the '73 Le Mans Green Ford Consul, and drove the four miles over to Uncle Mike's house on Glebe Road in Warlingham.

Our mission was to give Mike a ride to a key-cutting shop. Mike had locked his car keys in the trunk, I believe. I can't remember how it was possible to get a key made for a car if you didn't already have a key to copy, but it was a hit-and-miss process. It turned out that my father and I were providing transport for the second attempt - Mike had asked his neighbor for help before he reached out to my Dad, and the first replacement key was a dud.

Mike directed my Dad to some other part of South London which took a long time to get to. We went inside a small shop where every wall was lined with keys of all shapes and sizes. We waited around for a bit and eventually left with another key which would hopefully fit Mike's trunk, and then we drove back to Glebe Road.....where the key did not fit. 

But that is not the end of the story, because while we were there, Mike gave me a tour of his greenhouse. I don't have pictures from inside the greenhouse, but it is visible at the top of the next photo. 

At the time Mike collected orchids and his greenhouse was filled with multicolored specimens. To keep them in bloom he needed a warm moist environment which was provided by a paraffin heater running full blast and an old bathtub, which had been dug into the floor and filled with water. It was an expensive setup to operate. I spent most of the time hoping I wouldn't trip and fall into the bath. Then we went home.

I don't know who gave Mike his third (and fourth?) ride(s) to the key cutting shop, or what happened next at all, but it wasn't that much later when Mike got another car, this time a brand new one. Most people would have just toddled along to the local Vauxhall dealership and bought a Cavalier, but Mike had to order his car from Germany. He did remember to specify right hand drive, but otherwise it was a German Opel Ascona, a lot like the one below, but in a paler blue color and without the wide mud flaps. I don't think Mike's had the GT lights at the front either.

The Ascona was a very nice car, even if the sound system was permanently tuned to Radio 3. Mike was an exceptionally smooth and careful driver and always took excellent care of his cars. He kept the Ascona until he got promoted to a position which came with a company car. When that happened in the mid-80's, he took ownership of a very swish Mark III Ford Granada, a lot like the one below, but it wasn't a ghia. The Ascona was sold to someone I used to refer to as "Uncle Jeff", but he was no more of an uncle to me than Uncle Tom Cobley. Not long after that, Uncle Jeff was out in the Ascona when he was hit hard from behind, and the car was totaled. It was a sad ending.

Uncle Mike had the Granada when we all went to France in January 1987 to celebrate some anniversary or achievement of Mike's. My dad had a slightly older white Mark II Granada sedan at the time which was also a company car, and I remember the two Fords racing trundling across the Autoroute in the rain; it was January after all. 

Mike had other cars after the Granada, including a pale blue VW Passat which he sold on to my Dad, a maroon Skoda GU11, which was also passed on to my Dad, a white Skoda GU16 which...you guessed it...my father later bought from him, and at least one poncy convertible, which, fortunately, my Dad did not buy. As you might imagine, the memories I have of these cars are not really related to Mike, so they are not featured here. Instead, I have posted some of my favorite photos of Uncle Mike. May he rest in peace.

At the wheel of the legendary Le Mans Green Consul, 1974

Me helping Mike blow out his birthday cake candles, Crail 1975

I think I must have taken this one, Crail 1975

108 Snooker Tournament, Christmas 1983

Friday, September 8, 2023

Chisel Rack

Another vanity project....any excuse to get away from working on the deck/garage roof! I made this chisel rack about fifteen years ago. It was meant to be temporary, but it has been in constant use and could quite easily continue for many years to come. The real reason for upgrading it is I need space for more chisels...


The original was knocked up from scraps of plywood and a few panel pins, maybe some glue... 


I'm going to make something better from some scraps of walnut and oak. And no panel pins. 


This is the basic concept:


Glue up in progress...


After glue up. The bottom strip of walnut has been left off...


After flattening one side, planning to uniform thickness, and trimming to final size:


Marking out where to cut slots in the piece...


All the slots were cut on the cabinet saw and then cleaned up with a very narrow sanding block.


The back panel will be made from a piece of scrap oak - this piece came from a desk drawer that I broke up a while ago.


This is the basic concept; I will be attaching the leftover walnut strip to the top edge of the back panel, and then gluing this assembly to the front section:


This is after the back panel has been squared up, trimmed and the walnut strip added with a mixture of wood glue and pin nails. The two pieces were then glued together and left for a few hours.


I made some more trim pieces for the base and for the sides from walnut, these pieces are all planned to 0.20" thick, the same as the other walnut strips at the top. 


This is the view of the base after the strips were added - the slots I cut for the chisels do not extend all the way through as a result.


View from the front after final sanding, chamfering the front-facing edges, boring mounting holes and finishing with Odies hard wax oil; from this angle the chisel rack appears to be solid walnut:


This is the view from the back: 


After mounting and filling with chisels. Straight after taking this photo, I took the chisels out of the rack and sharpened every one of them.