Showing posts with label electrical. Show all posts

Wednesday, November 13, 2024

New Oven

It's been five years since we remodeled the kitchen - at the time we didn't replace the oven. The one we had looked old fashioned, but it was fully functional so we kept it. Even though it has carried on working all this time, it turns out that this may have been a false economy.

Here's why: The old oven was hard wired into a 220 Volt/50 AMP electrical circuit. And, while the new one is also 220 Volt, it comes with a plug and only requires a 20 AMP circuit (i.e. 40 percent of the power of the old oven). We use our oven a lot, so the cost of running an older appliance for five years would probably go a long way towards the cost of a new oven, if not cover it entirely. Oh well...

Converting the hard wired connection to an outlet at the back of the cabinet was straightforward, and I replaced the 50 AMP breaker at the panel with a 20 AMP breaker. This way I don't have to replace the cable between the kitchen and the circuit breaker panel. 

The other difference is that although the new oven has the same interior space, it comes in a much smaller package, which means the opening in the kitchen cabinets needs to be reduced. I started by building some blocks for the oven to stand on - the appliance will be aligned at the top and center of the existing opening:


I have a lot of scrap walnut plywood kicking around in the workshop, so this was a good opportunity to use some:


The next step is to glue supports at the base and sides of the opening to which the new edge pieces can be attached:


Same at both sides:


Next step is to add the sections which will be visible, which were mounted flush with the existing cabinet front:


The next picture is later after the glue has cured, small gaps have been filled with automotive body filler and the the face frame has been sanded to 220 grit.


Rollered on some primer...


...and two layers of top coat:


With new oven installed:

Monday, November 7, 2022

Principal Suite Revamp Part 1

If you're expecting an update on the Driveway Remodel, then you're early! Besides, I'm not, personally, or individually, lifting a finger on that particular project. Instead I've been continuing the quest to rid the interior of the house of 1980's era chintz.

This never ending journey has most recently arrived at the principal suite where the bathroom lighting fixture has to go.  Once more I do not have a proper before photo of the bathroom cabinets and the gaudy lighting fixture, but since we have the same setup in the hallway bathroom, I snapped a photo of that instead. About two-thirds of the bubs have been removed to reduce the brightness. 

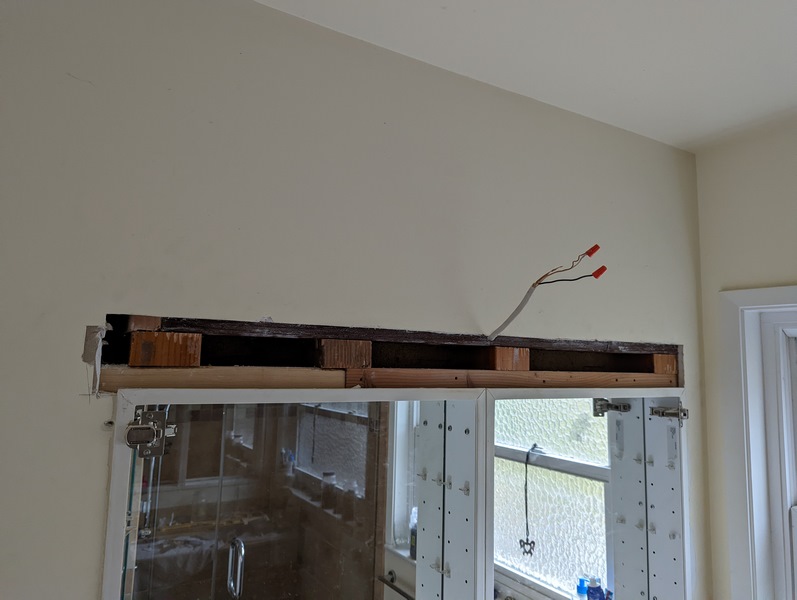
The cabinets are probably not what we would choose, but they do hold a lot of stuff, and they are in decent shape, so they're staying. The lighting fixtures on the other hand need to do one. This is back in the principal bathroom after the cabinet doors and the front panels at the lighting fixtures have been removed. The cabinet doors are mirrored on both sides, and the interior panels are also mirrored, so there was no avoiding looking at myself while doing this project. 


Somewhat unsurprisingly the whole thing is "one piece" so I had to pull the cabinets out of the wall in order to detach the lighting fixtures: 


There was not a whole lot of insulation in the wall cavity (so just like the rest of the house...), and whoever installed the cabinets didn't leave any blocking at the sides of the opening. 


This is how the cabinets will look when they go back


Appropriate blocking was installed to the sides of and above the cabinets and then I re-installed the cabinets a damn sight more securely than the last person did.


Patched the hole in the drywall...


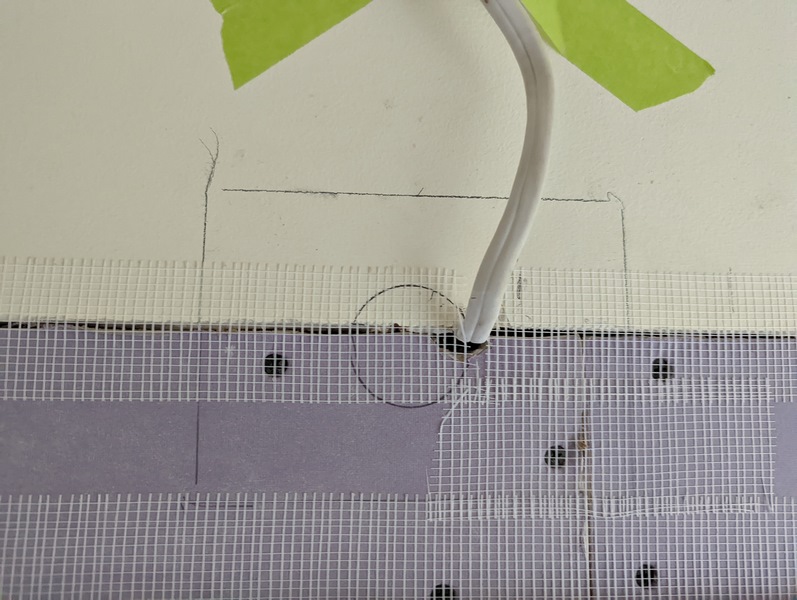
Marked the location for the new lighting fixture:


Re-plastering in progress...


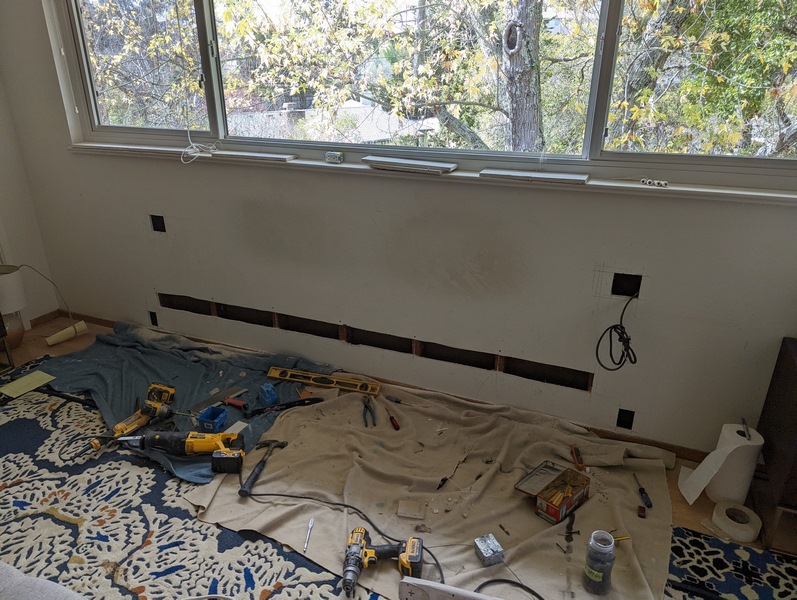
Moved into the bedroom.  The "headboard" wall has just one (1) outlet in the center, which means plugging in lamps and cell phone chargers requires extension cords and is generally a bit of a drag.  

This is a bit later after I cut holes for new outlets and a channel to thread the new cable through. I cut back the existing cable so that it comes from the right side, rather than the center, of the wall.


All buttoned up! I saved the pieces of drywall so that I could put them back where they came from; this saves a lot of time.


The upper outlet is easily accessible, and has the modern USB connections as well as the typical 110 V.  The lower outlet is controlled by the switch adjacent to the upper outlet. This way a lamp can be plugged in to the lower outlet and controlled from the switch with minimal effort. 


The big picture:


Re-plastering in progress...

To be continued....

Wednesday, November 2, 2022

Driveway Remodel Part 1

The project to end all projects. And before you ask, no, I'm not doing any of it myself, not one little bit. So, here goes: You can fit three large cars in our single-width driveway, but shuffling them around has always been a massive PITA, and it was even worse when we had four cars. Something had to be done before all the little sheep start showing up with their own vehicles*


The area of the yard next to the driveway has been a slag heap so long that it has been taken over by vegetation. There is a height difference of about eight feet between the bottom of the driveway and where Amy Sheep's all-electric space wagon is parked.


I was mostly at work on day one, but I managed to snap a picture of the concrete wall coming down:


End of day one: No more concrete retaining wall and considerably less dirt.


Day's two and three were for serious diggin'.


End of day three: The footing for the retaining wall will go in the bottom of this massive hole:


Marking out for forms for the retaining wall...


End of day four: Far side form is complete and rebar installed for the wall and the footing. The form is mainly constructed from 2" x 12" doug fir with some smaller dimension lumber.


End of day five: Most of near side form has been constructed; the remainder will be built after the electrical components are installed behind the forms.


To be continued...

(*it's either that or start walking places; their choice).

Sunday, July 17, 2022

Basement Electrical

Before I can get going with my soon-to-be-ordered cabinet saw, I need to paint the concrete floor and walls, and install an appropriate 220 Volt outlet. I need lights in this area too, and since the epoxy floor paint has been delayed in transit, I decided to get cracking with the electrical.

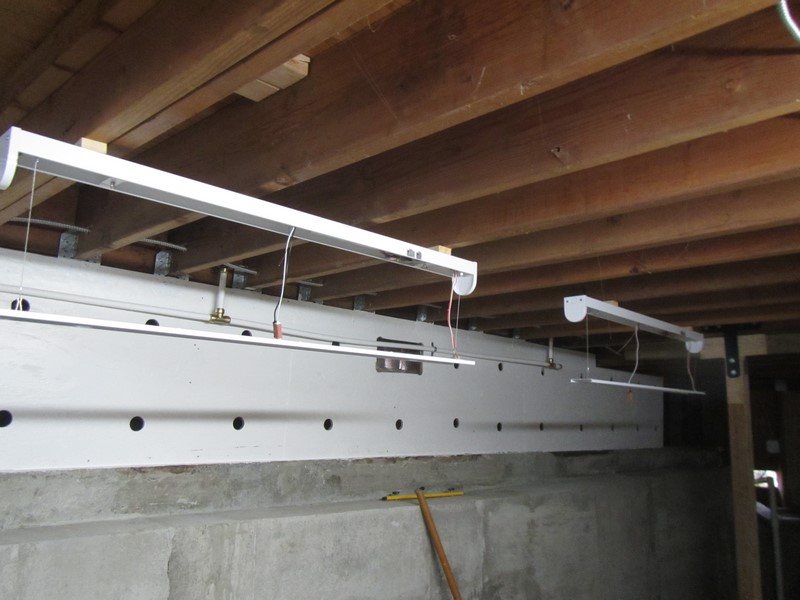
I'm installing four (4) LED strip lights which are very similar to those I installed in the workshop a few years ago, and the first step was to hang all four lights at the unfinished ceiling:


This is a considerable time later after the wiring has been completed. Two (2) of the lights you can see in the photo below were already present and are on a different circuit. The plan is that the original two lights are good enough for general use, and the additional four will only be needed when I'm running the cabinet saw or working in this area.


Moved on to installing the outlets - I'm putting regular 110 Volt outlets at five-foot intervals along the exterior wall. It was going to be at six-foot intervals, but the conduit comes in ten-foot lengths, so I just bought two and cut them in half.

I started off by attaching the outlet back boxes to the plywood paneling and running conduit-enclosed 12/2 cable between the boxes. I'm also adding an outlet at the exterior of the building and re-connecting the cable for the outside street lamp that I had to remove when I re-plumbed the hose bibs. 


This is later after the wiring has mostly been completed and the outlets installed. I was short of cable by about fifteen feet, so I couldn't bring power to the outlets, but they are otherwise complete at this point. 


The empty box at the center of the photo above is reserved for the 220 Volt outlet that will power the cabinet saw.  I will be tapping into the circuit which already passes through this area to service the vehicle charger for Amy Sheep's daily driver. 

The cable I'm using for the 220 V outlet is either 10/3 or 8/3 which was left over from when I installed the EV charger; it's hard to bend this cable without pliers. Somehow installing a 220 V outlet seems like a big deal, even though I used to mess about with wiring all the time in the UK, and everything there is 220. 


This is later after I ran the monster thick cable from the new box and cut into the existing cable. I had to put a 90 degree bend in the conduit so I could work around the plumbing lines we installed a few weeks ago.


I'm also installing a 220 V outlet in the garage, another example of Project Creep. I don't have a need for 220 V in the garage until I get a proper welder or a big compressor, and neither of those are on the horizon. But, since I have all the electrical kit on hand including plenty of cable, I decided to do it now anyway. The hardest part was figuring out where to drill the hole through the wall.


I covered both 220 boxes with tape for the time being because the outlets are on backorder.


This is a bit later after I cleared up all wiring detritus and put away the electrical tools and related paraphernalia. I quite enjoy electrical work because it's not too tiring and I have to keep thinking about what I am doing. 


A few days later I swung by my local home improvement center (you know the one) after work and picked up some more 12/2 cable for the outlets. It didn't take long to hook the outlets into the circuit breaker panel, so I spent the rest of the time before dinner cutting out a two-piece cover for the sump pit from some scrap plywood and giving it a quick coat of primer. The photo below was taken a few days later after the cover was painted with white semi-gloss.


This is how it looks installed: 


Thanks to the new wiring project, the sump pump now has its own outlet. This means no more extension cords trailing across the basement floor!


Coming soon: paining the concrete floor in the basement and installing the cabinet saw and dust extraction system - stay tooned!