Showing posts with label bathroom. Show all posts

Sunday, March 29, 2026

En Suite Bathroom Sink

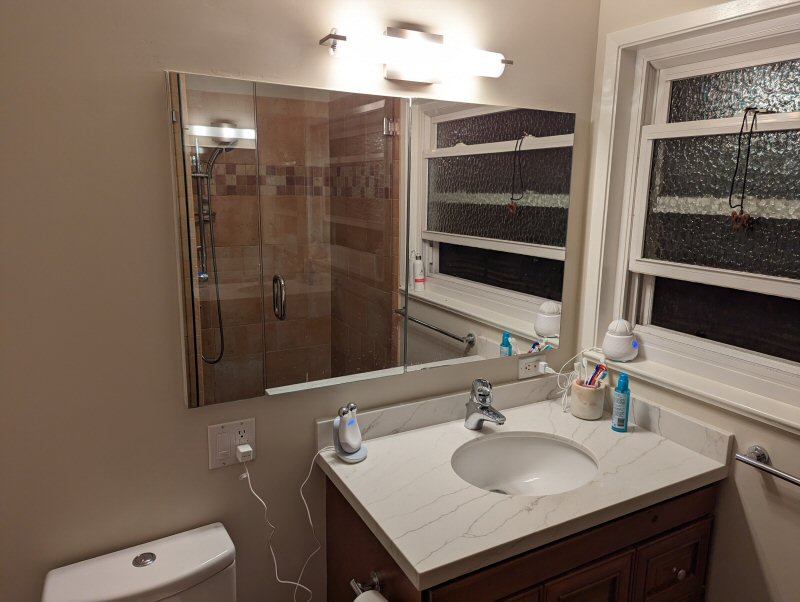
I don't know if you are aware, but if you're talking about a house, nobody says "master bedroom" or "master bathroom" anymore. Or even master suite come to that. Modern alternatives to "master" in this context are "primary" or "principal." Sadly, neither of these terms are adequate for the pokey bathroom in my house, so I'm going with "en suite" as the descriptor. We partially remodeled this bathroom about three years ago, and it has done ok with one small issue:

Unless you have the eyesight of Veronica Seider, you might need to view the close up:


There was really no practical way to replace just the sink, even if we could have found an identical replacement, so we bought a pre-assembled sink/countertop that is almost the exact same size, but has a slightly larger bowl volume - and looks a bit more modern although that wasn't the primary consideration. 

The weekend after the new sink was delivered, I just happened to be alone due to a combination of Spring break and work schedules, so it was a perfect time to put one of the bathrooms out of service. As I mentioned above, we replaced the countertop a few years ago, and it was installed from the top down, so there was no easy way to remove anything. After disconnecting the plumbing and removing the faucet I broke out the sink with a claw hammer. To be honest, the hammer was overkill. 


Obviously, I did not accomplish this entirely alone; even breaking up a sink requires a work crew standing by to observe in order to comply with Union rules. 


I was able to lever the backsplash and sidesplash off the wall without breaking them or busting up too much of the drywall. 


Getting rid of the stone countertop without doing any damage to the cabinet was a tough assignment. I had to cut the countertop and the supporting plywood panel into several pieces to achieve this, which made an awful lot of dust. Bare vanity cabinet after cleanup: 


Before I can mount the new sink, I need to replace the plywood panel. The whole point of the panel is to provide structural integrity to the cabinet. 


The panel would normally go over the cabinet and thus raise the height of the unit by the thickness of the panel....which is 3/4 of an inch in this case. However, the replacement sink is exactly 3/4" thicker at the perimeter than the original. I want to maintain the original height because there is very limited space below the wall cabinet for the outlet:


The solution is to set the new panel inside the cabinet - i.e. flush with the existing top edge. The easiest way to achieve this is to clamp the panel where I want it to go and secure it with pocket screws:


Even with help from my willing assistant, I wasn't able to set the sink....


....until Samuel Sheep came by the next day and provided the necessary muscle:


So, here's the thing: The new sink comes with a backsplash, but not a sidesplash....so, I decided to re-use the originals since I removed them intact. The only hinderance to this plan was one of size: the original pieces were a bit too long:


If I had taken measurements in advance, I could have placed the sink a little bit further from the wall and it would have been a perfect fit. Oops! I also could have ignored the overhang....but I just didn't want to. I ended up trimming the sidesplash with the same diamond encrusted screaming wheel of death that I used to cut up the original countertop. I did this bit of cutting in the workshop since I already de-dusted the bathroom once. I also re-installed and reconnected the faucet.


The original drain fitting was too small for this sink, so I need to find a replacement before operation can be restored:

Wednesday, January 11, 2023

Principal Suite Revamp Part 2

This project feels like it has taken as long as the driveway.....while the outdoors works were going on I was slowly chipping away at the decorating project, in between watching the World Cup and being down with Covid. Last time around I was finishing up the repairs to the walls in the bedroom and bathroom. When that was done, I installed the mounting bracket for the new lighting fixture. The paint color was still undecided at this point.

Onto the vanity. The dated granite countertop had to go - we will be replacing it with something modern and keeping the sink and vanity unit. 


Disconnecting the sink was a bit of a saga. The first problem was the shutoff valve at the hot line which was inoperable. I had to shutoff the entire water supply before I could remove the old valve, and when I did that I made another discovery. While the supply lines in the house are all copper, galvanized steel nipples have been installed between the copper pipe and the shutoff valves. Obviously galvanized steel pipe is prone to corrosion, and this is accelerated at the hot water side. In this case the end of the nipple was so bad that there was nothing left to thread onto. I had to make some immediate repairs with whatever I had on hand before I could turn the water back on and run to the hardware store. 


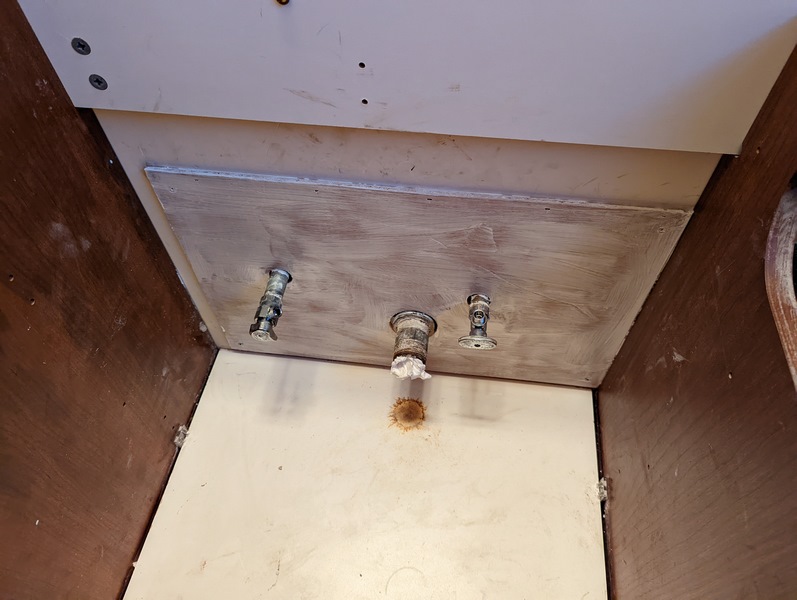
This is later, after I changed out both nipples and both shutoff valves. I didn't bother making full-on repairs to the wall because it will be hidden inside the cabinet. This area will get painted at the same time as the bathroom walls.


Moved back into the bedroom. We made some modifications to the closet when we first moved in - basically we moved the clothes rail up and installed a second rail below. I never got around to making any repairs to the walls....until now. The day after we emptied out the room, I started feeling unwell...


This is about a week later. I carried on painting even through I had covid, but the production rate took a serious hit.


This is a number of weeks later after the new countertop has been installed in the bathroom (by professionals) and the plumbing reconnected (by me). This was done about fifteen minutes before we left for our Christmas vacation.


After the New Year I didn't feel much like painting the bathroom, but eventually I got it done, and installed the new lighting fixture. It came out nice: 

Monday, November 7, 2022

Principal Suite Revamp Part 1

If you're expecting an update on the Driveway Remodel, then you're early! Besides, I'm not, personally, or individually, lifting a finger on that particular project. Instead I've been continuing the quest to rid the interior of the house of 1980's era chintz.

This never ending journey has most recently arrived at the principal suite where the bathroom lighting fixture has to go.  Once more I do not have a proper before photo of the bathroom cabinets and the gaudy lighting fixture, but since we have the same setup in the hallway bathroom, I snapped a photo of that instead. About two-thirds of the bubs have been removed to reduce the brightness. 

The cabinets are probably not what we would choose, but they do hold a lot of stuff, and they are in decent shape, so they're staying. The lighting fixtures on the other hand need to do one. This is back in the principal bathroom after the cabinet doors and the front panels at the lighting fixtures have been removed. The cabinet doors are mirrored on both sides, and the interior panels are also mirrored, so there was no avoiding looking at myself while doing this project. 


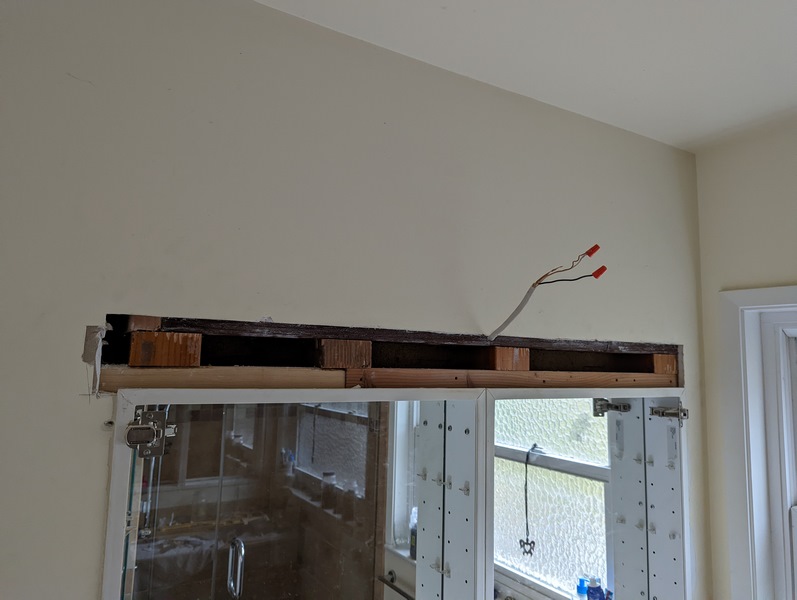
Somewhat unsurprisingly the whole thing is "one piece" so I had to pull the cabinets out of the wall in order to detach the lighting fixtures: 


There was not a whole lot of insulation in the wall cavity (so just like the rest of the house...), and whoever installed the cabinets didn't leave any blocking at the sides of the opening. 


This is how the cabinets will look when they go back


Appropriate blocking was installed to the sides of and above the cabinets and then I re-installed the cabinets a damn sight more securely than the last person did.


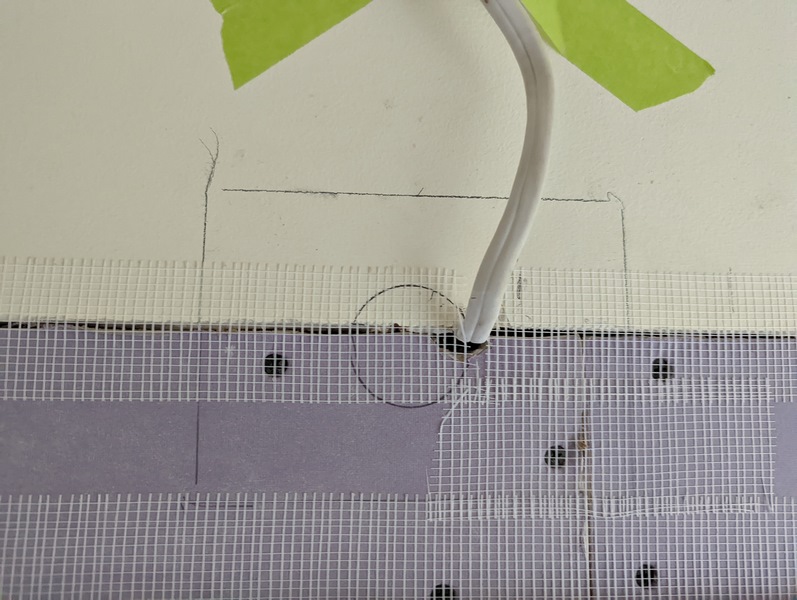
Patched the hole in the drywall...


Marked the location for the new lighting fixture:


Re-plastering in progress...


Moved into the bedroom.  The "headboard" wall has just one (1) outlet in the center, which means plugging in lamps and cell phone chargers requires extension cords and is generally a bit of a drag.  

This is a bit later after I cut holes for new outlets and a channel to thread the new cable through. I cut back the existing cable so that it comes from the right side, rather than the center, of the wall.


All buttoned up! I saved the pieces of drywall so that I could put them back where they came from; this saves a lot of time.


The upper outlet is easily accessible, and has the modern USB connections as well as the typical 110 V.  The lower outlet is controlled by the switch adjacent to the upper outlet. This way a lamp can be plugged in to the lower outlet and controlled from the switch with minimal effort. 


The big picture:


Re-plastering in progress...

To be continued....

Thursday, November 8, 2018

Basement Remodel

So, the reason for pressing ahead with bricking up the fireplace was so we could concentrate our efforts on the main living area...however, it became apparent, that what we really needed was a functioning living space where we could "be at home." So we switched our attention to the basement. Once we got going on this project, we realized it made sense to do the adjacent gym/guest bedroom and the guest bathroom at the same time. And the staircase.

A quick reminder of how it looked with staging....yuk!


The whole basement was a dumping ground for boxes and other crap for weeks after we moved in....


It took until the end of 2017 for the basement to be in a usable state.


Got the gym set up....


Moved the music studio into the gym...


As previously mentioned, we didn't bother taking photos of the re-painting, but installing the carpet tiles was worth getting the camera out for.


Building and installing the TV audiovisual cabinet was testing to say the least. This is how it looked after we got it filled up.


View of the basement looking towards the yard.


We painted the "gym" in the same color and extended the carpet tiles


And same again in the bathroom plus the vanity cabinet got a makeover.


Onto the noisy stairs with their unmatched handrails.


Painted the handrail and installed some padding at the treads with my new electric staple gun.


Fitted the new stair carpets with the same staple gun.


We had a volunteer test the carpet before we walked down it ourselves....