Saturday, January 21, 2023

Central Yard Part 1

Finally a nice day, and I have the afternoon off! 


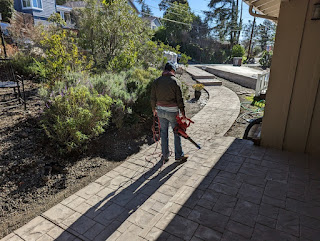
We have been bursting to get to work on "making good" the areas around our new concrete.  However, the first thing we have to do is apply sealer to the porch and walkway. The sealer will prevent stains at the new concrete and should protect the surface. To begin with I had Amy Sheep clean up the walkway and the porch with our noisy leaf blower, while I filled up the sprayer.


We are using a water-based matt sealer which does not require dilution:


Amy Sheep applied a light coat of sealer to the porch and walkway, and rebutted any offers of help apart from when the sprayer needed refilling, so I just stood around snapping photos and generally enjoying the first nice day of 2023.


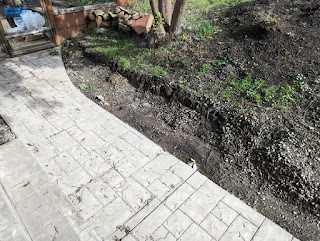
After the sealing was completed, we went inside and had some tea and biscuits and what not, and when I came back outside the sealer had dried and Amy Sheep was nowhere to be seen. I busied myself adding dirt to the voids at the uphill side of the new walkway, until the path was just a couple of inches above the dirt:


Then I laid my first course of moss rock against the path....


Then backfilled with more dirt up to the top edge of the moss rock...


And then rinse and repeat. I managed to build the section of "wall" you can see below from rock that we had on hand. Amy Sheep was nowhere to be found while this work was going on.


I have been backfilling with some rather nice top soil that was left over from another project. When this runs out, we will have to order some more from tut' garden center. 


I broke into the pallet of rock that has been sitting outside the house being rained on for the last couple of weeks...


Progress after a couple of hours....still no sign of sign of Amy Sheep.... 


The next day Amy Sheep emerged from her hiding place and we went to work building up the dirt and adding more moss rock to the uphill side of the path. The gradient is such that less rock is needed as we work towards the street.


The pallet of moss rock was shrinking fast by this point.


We managed to extend the rock all the way to the street...


...and build a sizeable wall at the porch side, before we ran out of rock and topsoil. The wall needs to be a layer or two higher in places.


To be continued....

Wednesday, January 18, 2023

Rain Stops Play

So, as has been well documented on this blog, we spent the latter half of 2020 and most of 2021 transforming the yard at the side of property - we built raised beds, constructed stairs and walkways and enclosed the whole area with deer fencing. For some reason, all my blog posts on this project was refer to  this area as the "front yard" even though is is located at the side of the house. Which would be fine, except that now it is time to work on the proper front yard, I have to come up with another description...hence  this is bit of the property is of now the "central yard." 

Apart from digging up some of this area so that we could expand the driveway and installing the new walkway, all we have done with this area is dug up the odd dead bush or small tree. There is no irrigation in this area (yet), so anything that it still alive is clearly drought tolerant. 


However, there are many things to do before we can think about planting new flora. We have some significant regrading to do where the new path cuts through...


...and behind the new wall.


We also have to figure out wat to do with these small areas immediately in front of the building:


We also have to finish off eradicating the remains of the old entrance path, move the mailbox over to the edge of the driveway, and get rid of the street lamp. 


The problem is, that although we came back from England just before New Year, full of ideas and ready to get cracking on the landscaping, it has been raining almost constantly ever since. We have discovered that the voids next to the walkway rapidly fill with water under these condition...


So far our progress has been limited to taking delivery of a pallet of landscaping rock....installing it in heavy rain does not appeal. The weather has been so bad, I've even had time to film the workshop tour I posted a few days ago!


To be continued when the weather dry's up...

Sunday, January 15, 2023

Workshop Tour

It's been a long time in the making, but our basement expansion/workshop construction project is complete enough to allow the cameras inside for the inaugural Workshop Tour. Thanks for watching, and I hope you enjoy the tour.


Saturday, January 14, 2023

Cabinet Saw Outfeed Table

I love my cabinet saw, but what I really need (next) is an outfeed table. I'm not sure if Sawstop sell outfeed tables, because I didn't bother looking - why would I, when I can make one myself using the Alm Fab design you can see on YouTube. My table is based on this design, only it is bigger, made of thicker material, and has two integral support legs. 

The outfeed table is constructed from two pieces of 30" x 44" plywood which is just less than 3/4 of an inch thick...for a total of a bit less than one and half inches. I cut one piece very accurately, and then used a flush trim bit on my new handheld router to make the second panel exactly the same size. I also used the router to make two 3/4 inch wide groves in the top panel, which align with those in the bed of my saw.


The next challenge is to make a timber baton which will attach to the angle bracket at the rear of the cabinet saw:


This piece also sets the height of the outfeed table. I used a combination of the saw and my new jointer  to mill this piece from a kiln-dried 2" x 4".


The plans call for 3/4" oak trim at the perimeter of the plywood panel, which I didn't have on hand and didn't want to buy due to the astronomical price of materials right now. Instead I poked around on my wood rack and found some 3/4 inch tongue and groove oak floor boards that were left over from a repair at a house I don't own anymore. 


I trimmed off the tongues on the cabinet saw, and then I took the boards over to the jointer and made the de-tongued edges square. 


Then it was back to the saw to trim the boards to the appropriate width. Easy as pie!


I bough a pair of adjustable support legs and attachment brackets, and all the hardware, directly from Sawstop. This means that the legs will match those on the saw side table and also be easily adjustable. I cut recesses in the second sheet of plywood to accommodate the brackets:


I used the long level to get the leg adjustment perfect...


....and then I installed the final piece of oak trim at the outer edge:


The outfeed table is attached to the saw via the baton I described above...


...and with recessed bolts into the side table through pre-exiting holes. 


There is a 3-bolt connection at each of the support legs.


Finished outfeed table, after wiping down with furniture polish:

Same saw, different angle!

Coming Soon: Video tour of the Papa Sheep Workshop

Wednesday, January 11, 2023

Principal Suite Revamp Part 2

This project feels like it has taken as long as the driveway.....while the outdoors works were going on I was slowly chipping away at the decorating project, in between watching the World Cup and being down with Covid. Last time around I was finishing up the repairs to the walls in the bedroom and bathroom. When that was done, I installed the mounting bracket for the new lighting fixture. The paint color was still undecided at this point.

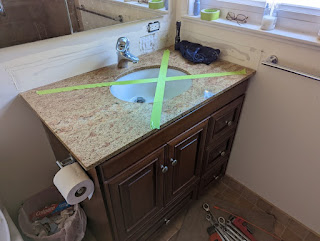
Onto the vanity. The dated granite countertop had to go - we will be replacing it with something modern and keeping the sink and vanity unit. 


Disconnecting the sink was a bit of a saga. The first problem was the shutoff valve at the hot line which was inoperable. I had to shutoff the entire water supply before I could remove the old valve, and when I did that I made another discovery. While the supply lines in the house are all copper, galvanized steel nipples have been installed between the copper pipe and the shutoff valves. Obviously galvanized steel pipe is prone to corrosion, and this is accelerated at the hot water side. In this case the end of the nipple was so bad that there was nothing left to thread onto. I had to make some immediate repairs with whatever I had on hand before I could turn the water back on and run to the hardware store. 


This is later, after I changed out both nipples and both shutoff valves. I didn't bother making full-on repairs to the wall because it will be hidden inside the cabinet. This area will get painted at the same time as the bathroom walls.


Moved back into the bedroom. We made some modifications to the closet when we first moved in - basically we moved the clothes rail up and installed a second rail below. I never got around to making any repairs to the walls....until now. The day after we emptied out the room, I started feeling unwell...


This is about a week later. I carried on painting even through I had covid, but the production rate took a serious hit.


This is a number of weeks later after the new countertop has been installed in the bathroom (by professionals) and the plumbing reconnected (by me). This was done about fifteen minutes before we left for our Christmas vacation.


After the New Year I didn't feel much like painting the bathroom, but eventually I got it done, and installed the new lighting fixture. It came out nice: