Showing posts with label basement. Show all posts

Friday, December 30, 2022

Sump Pump Redirection

The sump pump that we installed in the newest part of our basement has been working very well over the last year or so. The only slight issue is that the discharge line was never properly finished because we were waiting for our new driveway.  This is how the exterior portion of the pipe looked a few months ago:


The interior section wasn't much prettier:

I thought I could do a bit better. The primary target is to have as little pipe visible at the exterior as possible, which basically means making the exit hole low to the ground instead of just routing the pipe through the ventilation opening. The foundation is in the way in the basement, but in the garage there is no such issue. 

I started by boring a hole through the wall between the garage and the basement:


The hole at the garage exterior wall was much more difficult. I destroyed at least two hole saws trying to bore through the stucco before I switched over to a small cold chisel.


Once the holes were bored, I went back into the basement and disconnected the existing discharge pipe. There was a tiny amount of gravel at the bottom of the sump pit which I removed.


Reconfigured the discharge line inside the basement to pass through the wall into the garage:
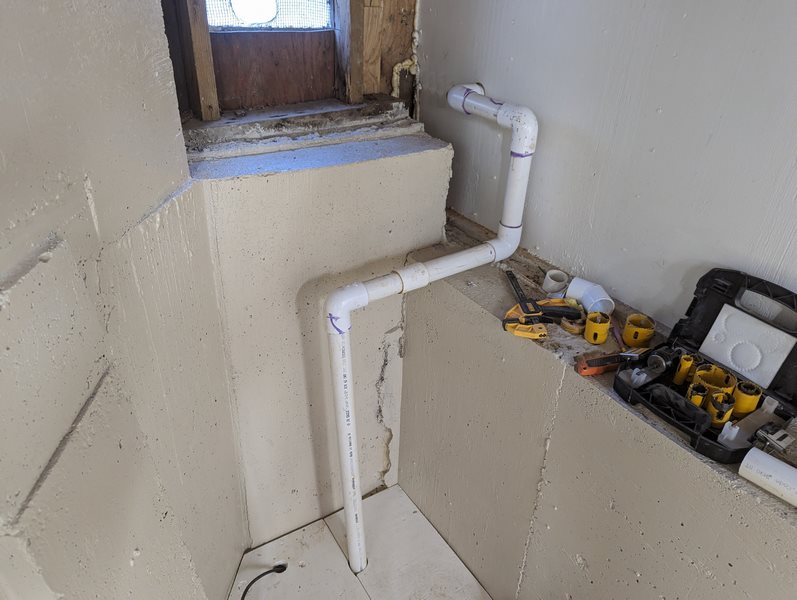

I bored the hole at the garage side of the wall with a slightly larger hole saw so that the elbow fitting would pass inside and the pipe can be flush with the wall. 


Extended the pipe to the exterior...


...where it terminates adjacent to the new drainage channel:

Saturday, October 29, 2022

Basement Support Post

During the basement expansion project we had to replace the support pillar towards the front of this area because the original post foundation was not deep enough. At the time I couldn't get (or make) an appropriately sized pillar, so I had to use a 4" x 4", and I was never happy with how it came out: 


I always intended to replace the post once I had my cabinet saw up and running. The new post was made by ripping a piece of 2" x 12" doug fir into two (2) strips which are 4.75 wide. A piece of 0.5 inch thick plywood was then sandwiched between the fir and the whole thing nailed off. This gives a laminated post with dimensions 4.75 x 3.5.


I installed a couple of temporary supports which were shimmed such that a very tight fit was achieved:


Removed the old post...


And installed the new one!


Since the new post is laminated I could not re-use the steel T-brackets - the bolts would have bitten into the pillar's soft center. Instead I'm using a pair of smaller L-brackets which I can bolt into the "meat" of the pillar and the crossbeam.


To add strength I attached 3/4 inch thick plywood skirts to both sides of the junction with more nails than you can shake a stick at:  


The new column is connected to the concrete support with the same steel bracket as before:

Sunday, August 14, 2022

Painting the Basement

After many moons, and twice as many suns, one bright evening I was distracted from my post-work cuppa and quick scan of the interwebs by a large box thudding onto the porch. The epoxy floor paint had finally been delivered! Cue more rejoicing than that time I won an Edward Jenner on the National Lottery.™ 

I am using the same beige concrete paint I laid down in the garage, only this time there is no oil to get off the floor first. It is debatable whether the concrete needs to be etched/cleaned with muriatic acid; I didn't bother since I know the concrete is brand new, and the surface is far from perfectly smooth. I did however do a very thorough vacuuming, a power wash and then another vacuuming. 


After all the prep, I was ready for a rest....so I roped in Sam to help with the painting. It took us the better part of two (2) hours to apply the base coat: 


We had to wait six (6) hours before we could apply the top coat, so we headed upstairs to have some scram and watch The Godfather. Then it was back to the painting:


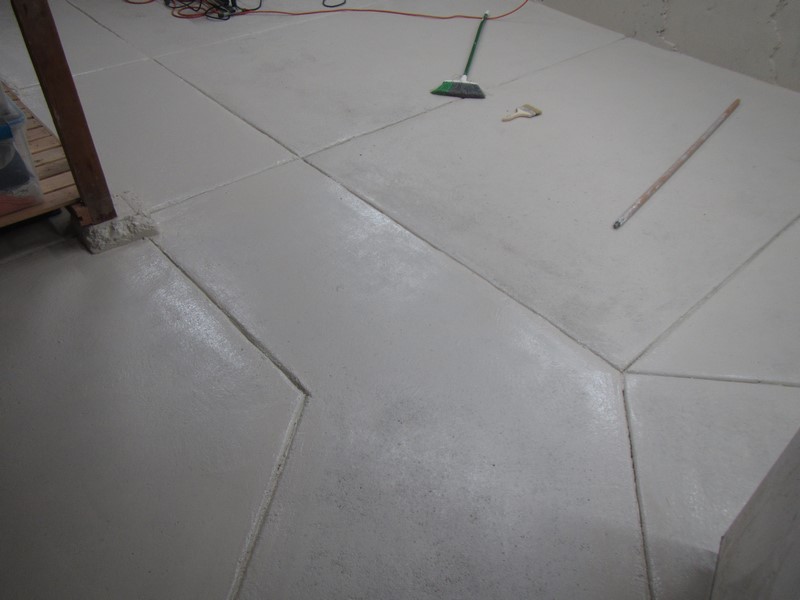
As you can see it came out very nice....


Until you step back a few feet and can see that we ran out of topcoat about halfway through:

There was nothing we could do at this point except clean tut' brushes and put the project on hiatus. Fortunately, the next batch of paint arrived in less than two (2) weeks, and we were able to get back to work:


I did consider hanging around in the basement for a bit longer, just so I could watch the paint dry....but then I had a better idea: time to order the cabinet saw I've been drooling over for months! No doubt it will feature in this blog soon enough ;)

Friday, August 12, 2022

Widening The Pathway part two

As documented here, after moving the water heater, the bottle neck in the workshop is the ridiculous gas line:

Safety first: after shutting the gas off at the meter, I lit one of the burners at kitchen stove and used up the residual gas in the pipes....and proved the supply was really off. Then I disconnected the flexible lines at the furnace and water heater; both the flexible lines are new and can be re-used. Building code in California requires at least eighteen (18) inches of flexible pipe adjacent to every appliance and there is a good reason for this.* 


I considered cutting out the old pipe with the screaming wheel of death, but it was safer just to unscrew it back to the T-piece. I actually started this project on a Friday morning before a weekend when Amy Sheep and the three little sheep were elsewhere - my thinking was that if I screwed up, I would have three days to get professional help!


Obviously I planned in advance which fittings to buy, but I was still a bit nervous about installing them correctly and getting the aligned where I wanted. 


I put a temporary strap on the horizontal section; the finished pipe will stand on the floor and make the strap redundant.


Like so, as they used to say on Blue Peter:


The pipe came out a quarter of an inch short, so I shimmed it with a a scrap of wood. I might make a more aesthetically pleasing spacer in the future.


This is later after I attached the two independent spurs which go to the appliances. This photo was taken before I was done pressure testing the system; once that was done, I reconnected the gas supply at the meter and reignited the pilot flame at the water heater. The furnace is electronic ignition, but we only need that a couple of months of the year at the most, so I typically leave it off. 


Much better! You could fit a double decker bus through there now:

*It's called earthquakes....

Sunday, July 31, 2022

Widening The Pathway part one

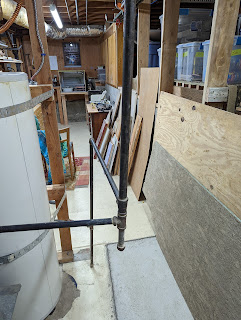
It's a first world problem, but the bottleneck in my basement/workshop space is the narrow gap between the cinderblock retaining wall and the gas line which serves the water heater and the furnace. Obviously it doesn't help that half of the space available is taken up with some sheets of plywood and a spare hood for the '68 that has been sat in one place or another for the last ten years.


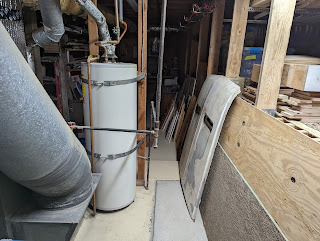
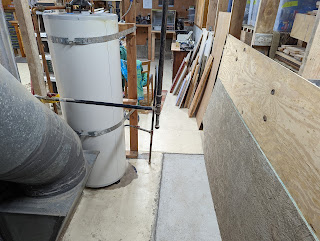
This is the same space a few hours later after I hoiked the hood into the other half of the basement and relocated the water heater.


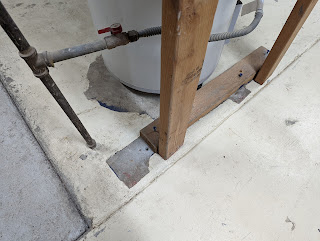
As you can see from the concrete floor, I only moved the water heater six inches, so the plumbing modifications were minimal, and I didn't have to empty the tank completely - I drained about two gallons and then used my body mass to reposition the tank. I had to move the blocking as well, but that was pretty easy, and I reused the original fasteners. The water heater was still working after this little exercise, you'll be glad to hear.


Now the gas supply line really is IN THE WAY! Stay tuned to see how this problem is solved!

Sunday, July 17, 2022

Basement Electrical

Before I can get going with my soon-to-be-ordered cabinet saw, I need to paint the concrete floor and walls, and install an appropriate 220 Volt outlet. I need lights in this area too, and since the epoxy floor paint has been delayed in transit, I decided to get cracking with the electrical.

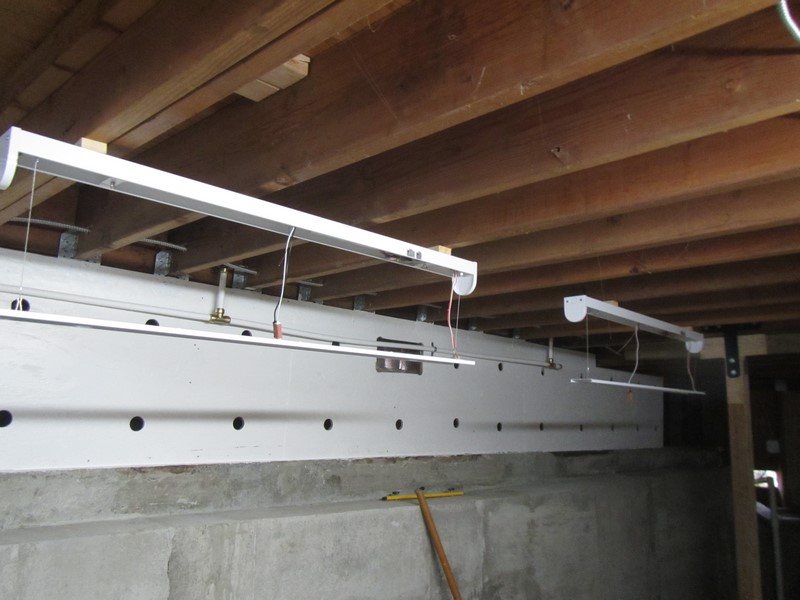
I'm installing four (4) LED strip lights which are very similar to those I installed in the workshop a few years ago, and the first step was to hang all four lights at the unfinished ceiling:


This is a considerable time later after the wiring has been completed. Two (2) of the lights you can see in the photo below were already present and are on a different circuit. The plan is that the original two lights are good enough for general use, and the additional four will only be needed when I'm running the cabinet saw or working in this area.


Moved on to installing the outlets - I'm putting regular 110 Volt outlets at five-foot intervals along the exterior wall. It was going to be at six-foot intervals, but the conduit comes in ten-foot lengths, so I just bought two and cut them in half.

I started off by attaching the outlet back boxes to the plywood paneling and running conduit-enclosed 12/2 cable between the boxes. I'm also adding an outlet at the exterior of the building and re-connecting the cable for the outside street lamp that I had to remove when I re-plumbed the hose bibs. 


This is later after the wiring has mostly been completed and the outlets installed. I was short of cable by about fifteen feet, so I couldn't bring power to the outlets, but they are otherwise complete at this point. 


The empty box at the center of the photo above is reserved for the 220 Volt outlet that will power the cabinet saw.  I will be tapping into the circuit which already passes through this area to service the vehicle charger for Amy Sheep's daily driver. 

The cable I'm using for the 220 V outlet is either 10/3 or 8/3 which was left over from when I installed the EV charger; it's hard to bend this cable without pliers. Somehow installing a 220 V outlet seems like a big deal, even though I used to mess about with wiring all the time in the UK, and everything there is 220. 


This is later after I ran the monster thick cable from the new box and cut into the existing cable. I had to put a 90 degree bend in the conduit so I could work around the plumbing lines we installed a few weeks ago.


I'm also installing a 220 V outlet in the garage, another example of Project Creep. I don't have a need for 220 V in the garage until I get a proper welder or a big compressor, and neither of those are on the horizon. But, since I have all the electrical kit on hand including plenty of cable, I decided to do it now anyway. The hardest part was figuring out where to drill the hole through the wall.


I covered both 220 boxes with tape for the time being because the outlets are on backorder.


This is a bit later after I cleared up all wiring detritus and put away the electrical tools and related paraphernalia. I quite enjoy electrical work because it's not too tiring and I have to keep thinking about what I am doing. 


A few days later I swung by my local home improvement center (you know the one) after work and picked up some more 12/2 cable for the outlets. It didn't take long to hook the outlets into the circuit breaker panel, so I spent the rest of the time before dinner cutting out a two-piece cover for the sump pit from some scrap plywood and giving it a quick coat of primer. The photo below was taken a few days later after the cover was painted with white semi-gloss.


This is how it looks installed: 


Thanks to the new wiring project, the sump pump now has its own outlet. This means no more extension cords trailing across the basement floor!


Coming soon: paining the concrete floor in the basement and installing the cabinet saw and dust extraction system - stay tooned!