Sunday, December 29, 2024

Swapping the Engine in the '67 F250 Part 1

The last time I worked on the F250 I was trying to deal with the sloppy steering. The first step was to bleed the power steering fluid. The plan was to jack up the front of the truck, so that the wheels were no longer in contact with the driveway, and then turn the steering wheel from lock to lock a number of times with the engine running. 

Before carrying out this plan I decided it would be smart to move the F250 onto the most level part of the driveway. Unfortunately, while moving the truck, I discovered it was losing a lot of oil.....out of the tail pipe! Yes, you read that right, the exhaust fumes were more oil than fumes, and I had a nasty slick across my driveway to prove it. 

There are two primary causes for oil blowing out of the tail pipe: It could be that oil is getting past worn piston rings, or it could be because the valve seats are worn. Or both. Either way, it's an unplanned engine rebuild and I already have one of those to deal with. 

I spent a few minutes spreading cat litter over the stray oil, and then I went inside to cry into my cup ot' tea. And that is where fate intervened, because at that exact moment, I received a text from my friend Ninja asking if I knew anyone that wanted to buy a running V8 289 that had previously been in a '66 Mustang.

Fast forward a couple of weeks and we spent a few hours on a very pleasant December afternoon loading the "289" into Ninja's '63 Ranchero and transporting it to the Sheep homestead.  

We used the hoist to lift the engine on the stand.

And then we made sure it secure.

On the road...

In the garage after unloading.

I also took possession of the hoist.

Once I had the "new" engine in the garage I had a look at the casting number on the block and found D4DE-6015-AA. The "6015" is Ford's code for an engine block, so can be ignored since it is present on every block. The rest of the code breaks down to a 1974 V8 small block with 302 cubic inch displacement and 2-bolt main caps. So, it may well have come out of a '66 Mustang, but it was clearly not original to that vehicle.

The next step was to do the same with the engine in the truck - it was supposed to be the original '67 V8 with 352 ci, making it a big block engine, and therefore not compatible with a 302 (or a 289 for that matter). But I had my doubts that it actually was....the intake manifold had the date code 1973 for one thing, and the chrome valve covers have a small block bolt pattern. To access the casting number on the block the starter must be removed, so I did that first, and then a close look under the block at the passenger side revealed: D4DE-6015-AA. And that's not a typo, it really is the same block from the same year. Perfect! This turn of events goes to prove that if you work hard enough at something for long enough you will eventually have some luck.

I pulled the original inline six engine out of the Mustang - with help - and I installed the V8 that is presently in that car with a whole team of helpers....but this time I'll be doing it mostly by myself and I'll be project manager for all of it. And I'm excited! Below is the last photo of the engine bay before I tore into it a few days before Christmas:


There are a number of things that have to be done before the engine can be lifted out. The precise order isn't critical, but it is important to start by disconnecting or removing the battery. I chose to remove it since I can keep the battery on a trickle charger more easily in the garage. 

After that I drained the radiator and pulled both hoses, the cooling fan and the air cleaner. Then I disconnected and removed the grounding strap, distributor, ignition coil and the alternator. I drained the power steering fluid and pulled the pump and then I drained all the gasoline out of the tank and removed the carburetor. Everything I am removing will need to be re-installed on the other engine, so I was careful to pack the fasteners and small parts in plastic bags which I labeled. I got under the truck, drained the oil, and disconnected the exhaust pipes from the headers. The last thing I did before the Christmas shutdown was remove the headers from the cylinder heads; the part numbers indicate they were made in 1980:


This is how the engine bay looks at this stage:

I still need to disconnect the engine from the transmission and from the mounts before it can be pulled out. Stay tuned for further developments!

Saturday, December 7, 2024

Unplanned Radiator work on the '67 F250

I posted a little bit ago about getting the F250 up and running. It didn't last long! I think I also mentioned that the power steering fluid was leaking somewhere. Well, I tried running the truck in the driveway, and there was no obvious leak. So, I took the truck out onto the road to test the steering under motion, and the truck died less than 50 yards away from the Sheep homestead! 

It was pretty obvious that the battery was the problem. Dang! I'm fortunate to have several good neighbors, and one of them used his modern F250 to tow me back to the top of my driveway. But that's not the end, because when I got out of the cab, I discovered coolant was leaking out onto the driveway. Oh dear! I have not had a lot of luck with the truck since I got it home - the fact that it made it home at all is starting to feel very lucky! 

The next photo shows a close-up of the problem after I removed the radiator: the drain valve at the base of the radiator has been sheared off, probably due to contact with the tow strap. Oops!


I don't have braising equipment, so I took the radiator (and the valve) down to Pankey's Radiator in Hayward, and they fixed it in five minutes. I am lucky that I live in an area that has so much automotive support close by.


The next bit was more difficult. Most people, if not everybody else in the world, would simply re-install the radiator. But I just could not do that without cleaning it first; there was too much rusty colored crud around the top to ignore. 


This is after power washing in the back yard...much cleaner!


Some of the rusty crap turned out to be discoloration and missing paint. So, the next question, is do I paint the radiator before I re-install it? 

I checked my spray paint stash and came up with two cans of black gloss which were probably bought to use on the Mustang. The radiator is too big too for my in-house spray booth, so I took it out to the back yard: 


Not the best paint job, to say the least, but still a vast improvement: 


Painted the radiator cap at the same time:

This is a few days later after I re-installed the radiator and some shiny new stainless steel hose clamps and replaced the battery. The F250 seems to be running ok now, so my next jobs are to try and sort out the sloppy steering and bring the turn signals and the horn back to life.


To be continued...

Tuesday, December 3, 2024

351 Windsor Valve Spring Replacement

To recap, the '68 has been off the road for about five (5) months while I have been trying to figure out why the engine was making such an awful noise, when running that is...

I discovered from my leak down test that cylinder #5 was leaking air through the exhaust valve. Or to put that another way, the exhaust valve was not closing when it should do. The next step is to find out why. I used a valve spring pressure tester to compare the spring at the #5 exhaust port with the other springs and it was much weaker. Conclusion: damaged or broken valve spring.


I didn't have a clue what spring to buy, but luckily I do have the original invoice from Summit Racing  from when I bought all the engine parts back in 2014.....so I dug that out and ordered a replacement spring. Which was out of stock....grrr...


While I was waiting I acquired a valve spring compressor from the same BAMA buddy that lent me the leak down test kit and the tool for assessing the spring pressure. I live by the rule: if you need it once, borrow it; if you need it twice, buy it. I'm lucky to have friends that have a lot more specialist automotive tools than I do and are willing to let me borrow them occasionally. 

valve spring compressor

valve spring being compressed

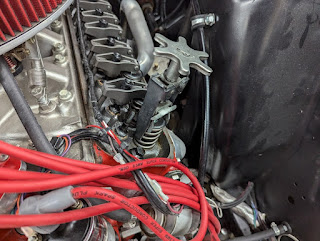
After installing the new spring I adjusted all the valves, put the covers back on and installed some new spark plugs. Then I discovered that one of my plug wires has been destroyed by heat from the headers:


While I was waiting for the replacement plug wires to arrive, I decided it would be a good time to change out my export brace. The new-to-me version is made of much thicker metal, which is difficult to discern from photos. It should stiffen the engine compartment and improve handling. I also plan to have subframe connectors installed, which should give a massive handling improvement, but I need to get the car running again first. 


Getting the export brace out is a bit of a palaver...the shock absorbers need to come out first, but to get them out you have to put the car on stands and take off the front wheels. And another thing: I zinc-plated as much of the Mustang hardware as I possibly could way back when, including the shock tower caps....but the finish on these pieces did not come out well. At the time I just installed them anyway:

This time around I replaced them with chromed-plated caps that I bought from NPD. This looks much better and was well worth the extra $$$: 


The following weekend my new set of plug wires had been delivered. The new wires have 135-degree angled connecters instead of the straight ends I had before, which should be easier to keep away from the headers:


After that, I tried to fire up the car and....no dice! The starter was spinning, I was getting spark, and there was fuel in the float bowl...so it must be compression. My first thought was that the valve adjustment was off, so I had a friend who knows what he's doing come by and have a butchers.

For this engine, which is a 1969 Ford 351 Windsor, the valve adjustment is three-quarters of a turn past the position where the push rod can still just be manually rotated when the cylinder is at Top Dead Center (TDC). It follows that the crankshaft must be appropriately rotated between each valve adjustment. While there was a tiny bit of play in one or two valves, they we pretty much spot on. Next we pulled the distributor and tried spinning the oil pump shaft with an electric drill. (Note: the drill must be in reverse). This is where it got concerning because instead of oil being pumped through the push rods there was....nothing! Oops...no oil pressure! This was confirmed at the instrument panel where there was no needle movement with the ignition on:


The simplest explanations for a complete lack of oil pressure include a bad oil pump, a blocked oil pickup or a pickup that is damaged such that it is easier to take in air instead of oil. So....I removed the crossmember, dropped the steering, pulled the mini starter and with all that out of the way I could drain the oil and drop the pan. Luckily it was the day after Thanksgiving and Terry Sheep was in town to lend a hand, pass me tools and wipe up spilled oil etc. We installed a new oil pump and pickup which I got from Summit - you can't beat their overnight shipping: 


After that I refilled the sump with clean oil and.....still absolutely zero oil pressure. This indicates a serious blockage somewhere in the engine which is clearly bad news. The next step is to pull the oil filter and have a look inside. Before that we had to (again) drain the oil, and this time there were several sizable chunks of metal that flowed out with it:


The same metal fillings on a paper towel:


I pulled the oil filter and left it to drain out overnight:


The next day I used a tool I just bought to cut open the oil filter. To be honest, you could quite easily do the same thing with a regular can opener or even a cutting wheel if you were careful. But I never miss a chance to buy a new tool if I can help it!


This is the snail, out of its shell, so to speak:


A mixture of fine metal fillings and even a fleck of red paint were found inside most of the folds:


A sample of filings transferred to a paper towel:


The next question is this: do I pull the engine and transmission in one piece, or do I disconnect the transmission from the engine first? I won't be able to get the engine onto my stand with the transmission attached. Watch this space to find out!