Friday, August 12, 2022

Widening The Pathway part two

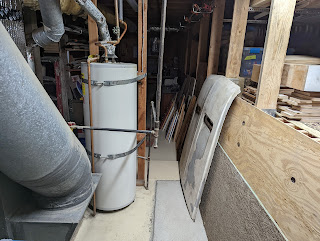
As documented here, after moving the water heater, the bottle neck in the workshop is the ridiculous gas line:

Safety first: after shutting the gas off at the meter, I lit one of the burners at kitchen stove and used up the residual gas in the pipes....and proved the supply was really off. Then I disconnected the flexible lines at the furnace and water heater; both the flexible lines are new and can be re-used. Building code in California requires at least eighteen (18) inches of flexible pipe adjacent to every appliance and there is a good reason for this.* 


I considered cutting out the old pipe with the screaming wheel of death, but it was safer just to unscrew it back to the T-piece. I actually started this project on a Friday morning before a weekend when Amy Sheep and the three little sheep were elsewhere - my thinking was that if I screwed up, I would have three days to get professional help!


Obviously I planned in advance which fittings to buy, but I was still a bit nervous about installing them correctly and getting the aligned where I wanted. 


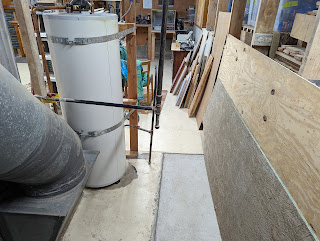
I put a temporary strap on the horizontal section; the finished pipe will stand on the floor and make the strap redundant.


Like so, as they used to say on Blue Peter:


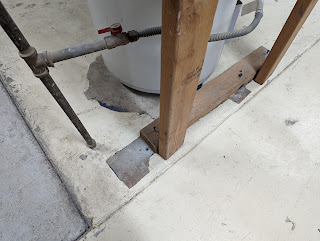
The pipe came out a quarter of an inch short, so I shimmed it with a a scrap of wood. I might make a more aesthetically pleasing spacer in the future.


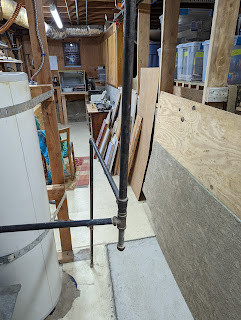
This is later after I attached the two independent spurs which go to the appliances. This photo was taken before I was done pressure testing the system; once that was done, I reconnected the gas supply at the meter and reignited the pilot flame at the water heater. The furnace is electronic ignition, but we only need that a couple of months of the year at the most, so I typically leave it off. 


Much better! You could fit a double decker bus through there now:

*It's called earthquakes....

Sunday, August 7, 2022

Back to the '68

It's been a while since I worked on my Mustang - having a new house to play with has taken up the better part of four years and it isn't finished yet. Like the car, it probably never will be.

I've owned the my 68 coupe since September 2008, and I started tearing it apart properly in the Spring of 2010. I finally had it running, registered and insured, and filled up with premium gas, by the end of the Summer of 2021. It has been a long-running joke in my family that the car would be ready for the Olympics - we just weren't sure which one! I drove the car to the September BAMA meeting – this marked the 68’s first General Meeting appearance since Fall 2009. I was careful to get photographic proof:

The car was running ok on the trip down to Hayward apart from a strange clanking sound when in third gear. I tried to keep out of third as much as possible on the way back. This plan was worked well for a while, but untimely failed. I was doing about 65 on Highway 13, less than two miles from home, when the car emitted a very unpleasant clunking sound and ground to a halt. I’m not sure exactly what happened, but it was apparent that the car was stuck in gear, probably fifth, given that was where it crapped out. Somehow, I managed to start the engine and get the 68 rolling, but this only got me as far as the freeway off ramp where the car stalled out on the upward gradient. The remaining mile of the journey was completed on the back of a tow truck.

The following weekend we had another couple of pallets of concrete delivered, and while I was working through that it became apparent that all the dust and mess in the garage was not going to be helpful if I started tearing the Mustang’s drivetrain apart. Not to mention that working on the car was the last thing I felt like doing.

So, as documented elsewhere in this blog, I Carried On Concretinguntil we had worked through more than six hundred (600) eighty (80) pound bags and moved out thirty (30) cubic yards of dirt and rock. At the time of writing the basement construction has finally been completed bar painting the concrete floor.

Or to put that another way, now is the perfect time to see if I can get the Mustang back on the road. This is how the 68 looked with the cover removed. This photo does not do justice to how dusty the car was. The car has not moved from this spot since it was winched off the back of the tow truck last year. And how could it when it is stuck in gear? 


At this point, I still didn't know precisely what was wrong with the car - given the symptoms, I was thinking the clutch or transmission - or both - would be a good place to start. It's worth noting that the clutch pedal still goes up and down and the shifter stick can find all the slots in the box. I used the equipment below to lift the car off the ground and began my inspection.


Discovery #1 - a small stain immediately below where the fuel line joins the filter - probably a gas leak. It's certainly something to fix, but unlikely to be the responsible for the drivetrain failure.


Discovery #2 - a much larger stain below the junction of the engine and the bell housing; now we're getting somewhere!


Next step: pull the driveshaft. This was a good opportunity to wipe off all the concrete dust.


Then, remove the shifter stick - it is much easier to do this without a carpet and a shifter boot in the way. I also disconnected the clutch cable, the backup lights and the speedometer cable. 

Time to pull the transmission - or what my grandfather would have called tut gear box. My Dad's old friend Billy Sultana once dropped an open automatic gear box on this left hand. When the injury finally healed up, he had some gruesome zig-zag scars on his fingers where they were sliced by the cogs. I didn't want that to happen to me, so I called in Samuel Sheep to help:


Getting the transmission mount and crossmember out wasn't very difficult - one of the crossmember fasteners was actually missing - oops - but the transmission bolts were tough to access. We had to get creative with a mixture of long socket extensions and a universal joint to get at all the bolts. After that there was a lot of pushing and pulling the transmission and wiggling of the floor jack before we could snap the picture below. I could not have done this without Sam's help.

Next, we had to pull the bell housing and the clutch. The bell housing bolts were very difficult to get at, and I had to use all my strength to get them undone. The clutch was a bit easier. The clutch was one of  very few components which was not either restored to original condition of replaced with a brand new part; one of my BAMA friends donated a slightly used one. There wasn't anything obviously wrong with the clutch, but I already have a much nicer replacement on hand. From what I can tell, the flywheel is still in decent shape. Hopefully the rebuild goes as smoothly as the tear down. Stay tuned to find out!

Sunday, July 31, 2022

Widening The Pathway part one

It's a first world problem, but the bottleneck in my basement/workshop space is the narrow gap between the cinderblock retaining wall and the gas line which serves the water heater and the furnace. Obviously it doesn't help that half of the space available is taken up with some sheets of plywood and a spare hood for the '68 that has been sat in one place or another for the last ten years.


This is the same space a few hours later after I hoiked the hood into the other half of the basement and relocated the water heater.


As you can see from the concrete floor, I only moved the water heater six inches, so the plumbing modifications were minimal, and I didn't have to empty the tank completely - I drained about two gallons and then used my body mass to reposition the tank. I had to move the blocking as well, but that was pretty easy, and I reused the original fasteners. The water heater was still working after this little exercise, you'll be glad to hear.


Now the gas supply line really is IN THE WAY! Stay tuned to see how this problem is solved!

Sunday, July 17, 2022

Basement Electrical

Before I can get going with my soon-to-be-ordered cabinet saw, I need to paint the concrete floor and walls, and install an appropriate 220 Volt outlet. I need lights in this area too, and since the epoxy floor paint has been delayed in transit, I decided to get cracking with the electrical.

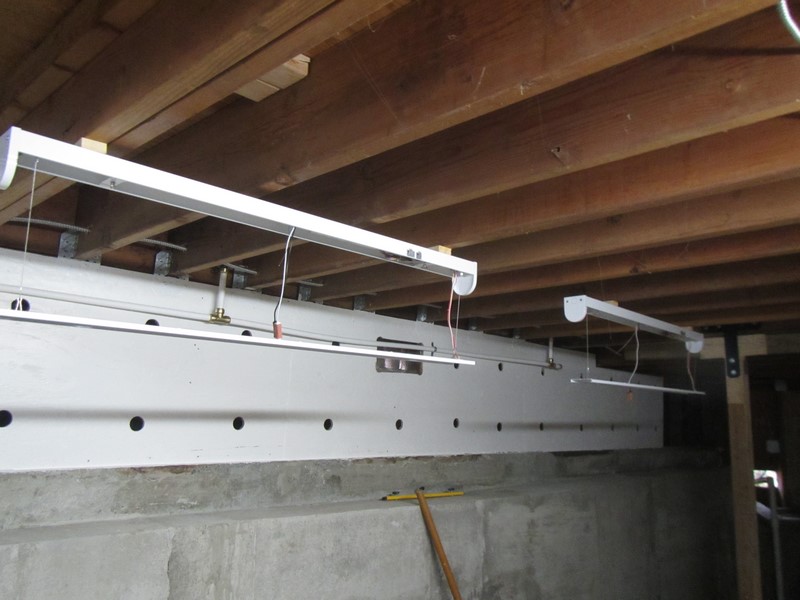
I'm installing four (4) LED strip lights which are very similar to those I installed in the workshop a few years ago, and the first step was to hang all four lights at the unfinished ceiling:


This is a considerable time later after the wiring has been completed. Two (2) of the lights you can see in the photo below were already present and are on a different circuit. The plan is that the original two lights are good enough for general use, and the additional four will only be needed when I'm running the cabinet saw or working in this area.


Moved on to installing the outlets - I'm putting regular 110 Volt outlets at five-foot intervals along the exterior wall. It was going to be at six-foot intervals, but the conduit comes in ten-foot lengths, so I just bought two and cut them in half.

I started off by attaching the outlet back boxes to the plywood paneling and running conduit-enclosed 12/2 cable between the boxes. I'm also adding an outlet at the exterior of the building and re-connecting the cable for the outside street lamp that I had to remove when I re-plumbed the hose bibs


This is later after the wiring has mostly been completed and the outlets installed. I was short of cable by about fifteen feet, so I couldn't bring power to the outlets, but they are otherwise complete at this point. 


The empty box at the center of the photo above is reserved for the 220 Volt outlet that will power the cabinet saw.  I will be tapping into the circuit which already passes through this area to service the vehicle charger for Amy Sheep's daily driver. 

The cable I'm using for the 220 V outlet is either 10/3 or 8/3 which was left over from when I installed the EV charger; it's hard to bend this cable without pliers. Somehow installing a 220 V outlet seems like a big deal, even though I used to mess about with wiring all the time in the UK, and everything there is 220. 


This is later after I ran the monster thick cable from the new box and cut into the existing cable. I had to put a 90 degree bend in the conduit so I could work around the plumbing lines we installed a few weeks ago.


I'm also installing a 220 V outlet in the garage, another example of Project Creep. I don't have a need for 220 V in the garage until I get a proper welder or a big compressor, and neither of those are on the horizon. But, since I have all the electrical kit on hand including plenty of cable, I decided to do it now anyway. The hardest part was figuring out where to drill the hole through the wall.


I covered both 220 boxes with tape for the time being because the outlets are on backorder.


This is a bit later after I cleared up all wiring detritus and put away the electrical tools and related paraphernalia. I quite enjoy electrical work because it's not too tiring and I have to keep thinking about what I am doing. 


A few days later I swung by my local home improvement center (you know the one) after work and picked up some more 12/2 cable for the outlets. It didn't take long to hook the outlets into the circuit breaker panel, so I spent the rest of the time before dinner cutting out a two-piece cover for the sump pit from some scrap plywood and giving it a quick coat of primer. The photo below was taken a few days later after the cover was painted with white semi-gloss.


This is how it looks installed: 


Thanks to the new wiring project, the sump pump now has its own outlet. This means no more extension cords trailing across the basement floor!


Coming soon: paining the concrete floor in the basement and installing the cabinet saw and dust extraction system - stay tooned!

Sunday, July 3, 2022

Sprucing up the ducting

The basement area that we spent almost a year excavating and lining with concrete is creeping towards completion. At the time of writing at that is left to do is install the LED lighting and electrical outlets, and paint the concrete floor and walls with the same epoxy or paint I used in the garage. And install the cabinet saw.

Well, it turns out there was one other thing: the insulation at the furnace ducting that passes through this area and through the workshop was in awful condition as you can see below. This is a good example of Project Creep: it was never our intention to do anything with the ducting, but it was so filthy it would have been more work to try and clean it.


After very carefully removing all the old fiberglass insulation, I discovered the living room duct wasn't even connected. And of course, the old white tape is basically asbestos


I re-sealed the detached ducting with modern aluminum tape, and wrapper the same tape around all the old asbestos tape - encapsulation is actually safer than trying to remove it. 


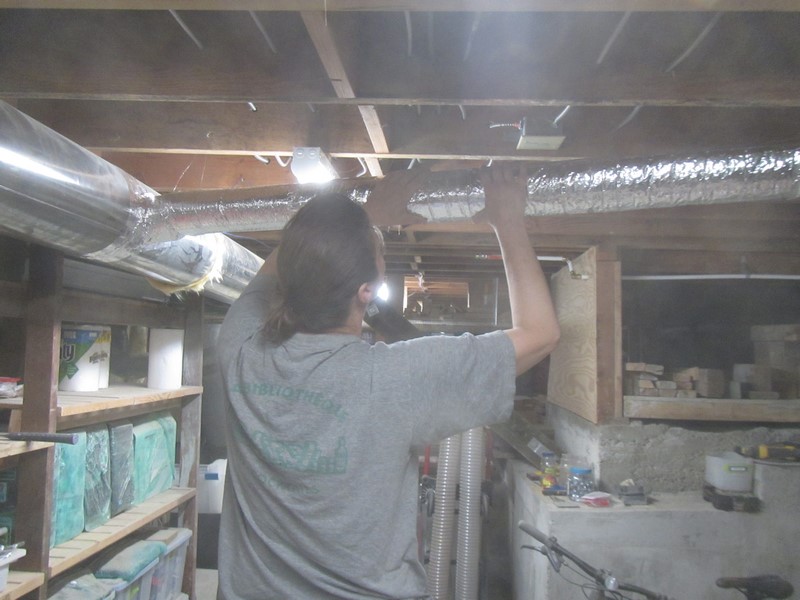
The replacement insulation is essentially plastic bubble wrap which has been very thinly coated with aluminum. We installed it with a lot more of the same aluminum tape. Amy Sheep was on hand to help with the first part of the project.


When I was working on my own, I had Wimbledon 2022 to keep me company:


All done!


I did the ducts which pass through the workshop at the same time.


Monday, June 27, 2022

Hose Bibs

A few weeks ago, I destroyed the hose bib that passed through the area that is now occupied by our front porch. Amy Sheep has been struggling to water some parts of the yard ever since.....

So....time to do something about that! I started off by attaching a new lead-free brass bib to a copper compression fitting (don't forget the thread sealer!) and then soldering that to an overlong section of copper pipe. I need four of these in total, but I just made one to begin with and then went into production later. I've actually never "sweated pipe" before, so it was fun to learn something new. 

The next step was to drill a one inch diameter hole in the wall. The pipe passes through brickwork at the exterior and the rim joist at the basement side, so I had to use a mixture of drill bits. i.e., 3/16 long series masonry all the way through from the outside, then expand the hole in the brick to one-inch from the exterior, and then come back the other way with a one-inch spade bit. The pipe is 3/4 inch internal diameter, so I have a bit of wiggle room. This is the view from the outside with the hose bib in place:

At the basement side, the copper pipe has been trimmed and connected to a new PEX supply line with a push-on brass 90-degree Sharkbite fitting. I used these fittings for all of the copper/PEX and PEX/PEX junctions. The brass clamp in the background is screwed into the rim joist and is designed to stop the hose bib from rotating.

I also installed a pipe which will serve the irrigation system in the front section of the yard. PEX pipe is light sensitive, so this section had to be made from copper. I sweated these joints since I don't want them to rotate like the push-on fittings do. 

I installed two hose bibs at the front of the house, either side of the irrigation line. Later I will install a third next to the garage and a fourth at the interior of the basement close to the sump pump. The plywood paneling that I installed in the basement a few weeks ago was primed and painted before the plumbing lines were installed. 

The opening you can see at the right side of the photo above is an access panel for the electrical junction boxes that I will be installing - this area needs lights, outlets and a 220 V connection for the cabinet saw. This is also where the cables that serve the exterior outlet and the streetlamp pass through the exterior wall.


Sam helped with the painting, and we did the wall between the basement and the garage at the same time:


This is the connection to the exiting plumbing line. The plywood shear wall is much stronger with the pipe passing through it than it would have been if I installed the plywood around the pipe.

That's all for now...