Last time around we spent the best part of four days re-sloping and re-installing deck boards more or less from the double doors out to the apex. The next Saturday, we had a massive unseasonal downpour, which meant we couldn't work on the deck....and at the same time we discovered that the deck boards still do not drain correctly:

From studying the areas where the water was ponding, I discovered that the deck boards curl upwards after the last attachment point. So, the next day, after the weather cleared up, I went out and cut off the excess sections. I cut the edge a couple of inches longer than what I think the final measurement will be; this gives me some wiggle room when I'm installing the gutters.

A quick test with the hose pipe showed there was a lot of improvement, but still not quite there:

To completely remove the "curling effect," I need to make an attachment point closer to the ends of the boards. The next photo shows the view from underneath and was taken the following weekend. In the absence of the fascia board, most of the boards overhang the house by almost a foot.

I could hang the fascia board next and screw the deck boards into that...but the fascia will only be 3/4" thick. I need something a bit "meatier" to really anchor the deck boards and prevent them from curling upwards. The solution is to install 2" x 4" blocking between each pair of rafter tails. I used treated lumber for the blocks because I don't have to paint them, and I have a bunch of scrap pieces knocking about from the original deck.

This is later on after blocking was installed at the way along the edge of the deck that overhangs the left side of the garage:

I installed four (4) deck screws into each board, all of which hit the blocking or the rafter tails:

This is later after hosing down the deck again....No standing water!


It looks a bit more impressive if you look the other way and count back from the apex (13 boards):

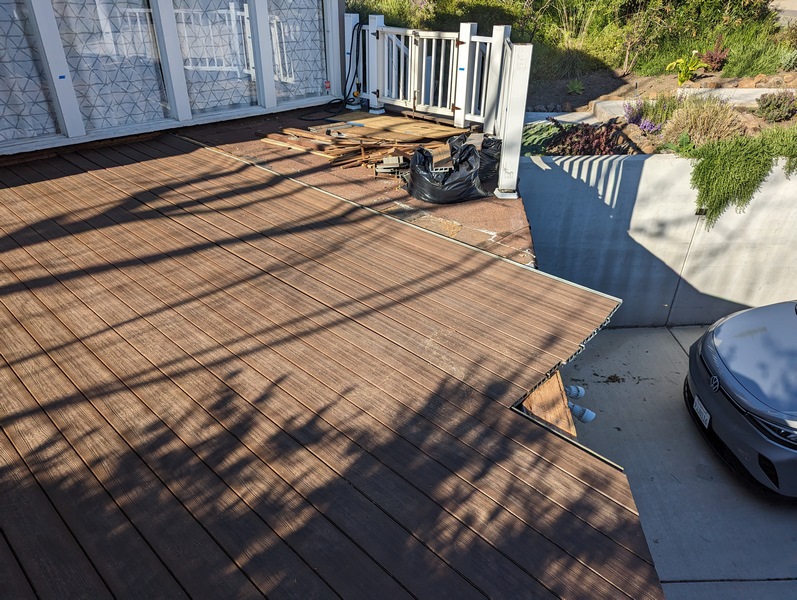
The last few boards were just dropped in place for now:
This is the last bit of the original roof, probably less than a quarter of the total area:


I was particularly keen to see below this soft spot which happens to be located above the cabinet saw room...this area has been leaking all the time we've lived here...

As expected....lots of moisture-related damage around the posts:

Some close-ups of the rotten plywood:


The top step of the stairs and the stringers were installed over the roofing material, so they had to be removed:


To be continued....


No comments:
Post a Comment