Sunday, May 22, 2022

Front Porch Part 2

It has been another busy few months in the Sheep Family Compound. For a number of reasons our DIY activities have been in the background over the last few months, but finally one of our projects has reached the stage where it can be transcribed onto the modern equivalent of a stone tablet.

If 2020 and 2021 were side yard and raised beds summers, then 2022 is definitely a front yard summer, staring with the porch and the entrance to the house. This is how I left off the weekend before the Christmas holidays. I knew it would be a few months before I could work on this project again, so I spread some pea gravel on the area we walk through.


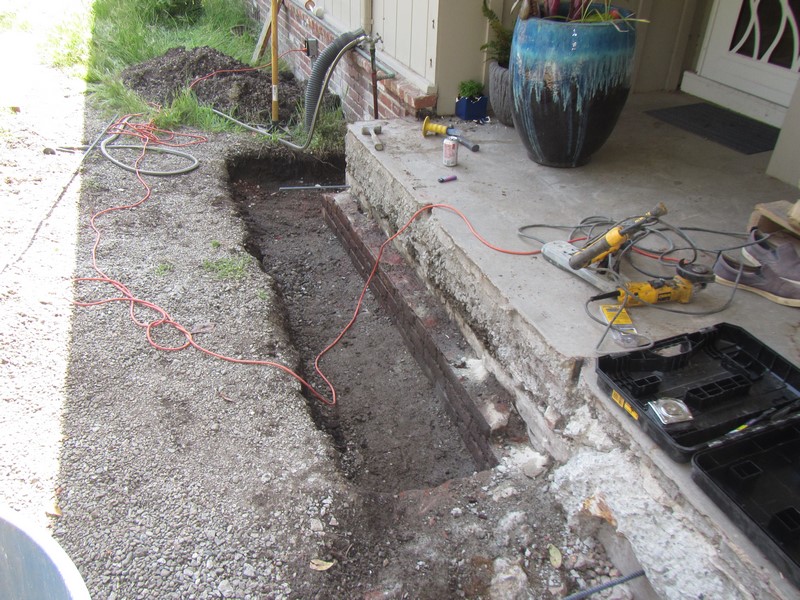
This time around I had Amy Sheep start digging out for the porch extension. 


While that was going on, I set to work destroying the concrete steps that I didn't finish last time.. 
 

This was the result after plenty of loud jackhammering and more than enough digging:


I installed rebar and built forms for the right side first - the expanded porch is too big to pour in one go, and I can save money on lumber by purchasing half of what I need and using the same boards twice.


Some very labor-intensive concrete procurement later...


...then just add one concrete mixer, one Amy Sheep...


...plus one Delilah... 


...and that equals the first section all done!


This is a week or two later with the forms removed:


Finished up digging out at the left side - we left this bit as long as we could because this is the bit we mostly walk across.


Unfortunately, the existing hose bib runs right through the area where the porch will be expanding at the left side. I will have to replace it at some point, probably after Amy Sheep gets fed up with using a watering can.


This is later, after the rest of the rebar has been installed and the forms constructed...
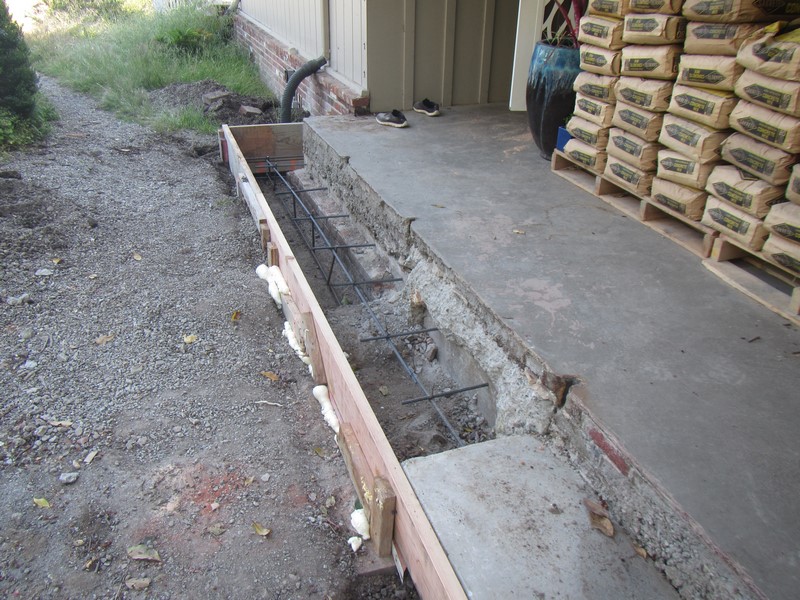

..and the porch has been refilled with yet another batch of bagged ready-mix.


Luckily, Amy Sheep was on hand again to operate the concrete mixer.


Just a few minutes after this photo was taken...


...this happened - and it wasn't Delilah: 


Fortunately, I was able to smooth things out:

This is another week later, and we're all ready to pour the new edge of the upper step: 


This was a small ten bag pour, so really did not take very long. We left it until the late afternoon to pour the concrete so that the porch would be shaded. The curing time can be significantly reduced in direct sunlight which negatively affects the concrete's strength.


All done...kind of. This is just the porch skeleton; the porch, steps and the entrance pathway are going to be paved in the not-too distant future. Stay tooned!

Sunday, February 27, 2022

Basement Expansion Part 20

The last post, which appear in this blog at the end of last month told the story of work done up until our Christmas Holidays. And very nice they were too, thanks for asking. It has become traditional in the Sheep Clan to either flog our guts out over Christmas/New Year on some all-engulfing DIY project, or to do absolutely nothing productive whatsoever have a nice relaxing break from such activities. The year just passed was most definitely in the latter category, but do not let that fool you; since the turn of 2022, we have been hard at it with the concrete mixer and the finishing trowels!


I didn't take as many photos during this part of the project as I might have done, but oh well. The first step was to install a plastic vapor barrier - this means that if the drainage system fails the water will not leach through the concrete and rust out the rebar. 

With that done, the floor was divided up into a grid where the lines in the grid/seams in the concrete line up with those in the sections we poured previously. This pattern dictates that the first section of the floor will be an L-shape. I installed the rebar after I built the forms which makes it much easier to building the forms, but impossible to remove them without total destruction. 


After that we mixed concrete and poured each section in turn. I used a combination of my float and the laser level to get the surface flat.


Over to the other side, and rinse and repeat:


One day during this process I took delivery of some rebar - six (6) pieces, half inch diameter, 20 feet long. There was a long and rather confusing conversation with the delivery driver about where I wanted to the rebar to be put....until I realized he wanted to use his forklift truck to offload it!!!  OMG, I had to get my phone out and snap a photo to prove it happened! After he was finally done, I picked it up with one hand and dragged it into the garage in one motion. 


The small section around the sump pit was poured separately, and without any rebar. I want to be able to break this bit out if I ever need to, without destroying the floor.  


sump pump connected and working!

By now, the first section of the floor was cured, so it was back over to that side of the basement to pour the next strip. Doing the floor in sections means we only have to work intensively for a couple of hours at a time to mix the concrete; the finishing can then be done gradually over the next several hours without any input from Amy Sheep.


We continued leapfrogging from side to side a couple more times...


Until there was only one space left to fill in. We left the largest one until the end...


The two photos below we taken this weekend. It's been four or five weeks since the last section of concrete was poured. It that time everything in the basement and workshop has been swept and vacuumed to the point where I have gotten rid of all but the most stubborn concrete dust. I still have the concrete mixer and all the related infrastructure on hand for the porch project, but once that is done, I will be moving them on and freeing up this space for the cabinet saw. Totally new floor space, not including the bit we could previously walk through is about 350 square feet. One day we might have a fifth bedroom and fourth full bathroom down here.....

Thursday, January 27, 2022

Basement Expansion Part 19

It's the week before the week before Christmas, and I've got the Tuesday and Wednesday off work to plug away at the basement project.  The first day began bright and early with a delivery of two (2) yards of pea gravel to my driveway. 


It is noteworthy that while Tuesday was a beautiful sunny day, it had rained quite hard for the two previous days. In a way, this was very timely because it provided a nice test of my drainage channels. Standing water made testing the slope, and removing any minor blockages much easier, but also a lot messier.


The area around the sump pump was particularly unpleasant to work in. However, it did become apparent that the pressure treated box around the pump actually slows the pump down a lot. See below for how this problem was solved.


The first order of business was to extend the main drainage channel into the corner where we just got finished with the perimeter.


Once that was done, I installed a couple of inches of pea gravel in the trench and wiggled the pipe around until I had the slope I wanted. The holes you can see in the pipe actually go to the bottom at the final install.


The second section of the pipe was installed in the same way:


On to the sump pump. What I really need is something like the plastic crate below - something like it, but with much smaller holes, because I need to keep the pea gravel away from the pump.
 

The solution was a plastic box which I spent a good twenty minutes riddling with ¼ inch diameter holes. The inlet hole for the primary drainage pipe was cut with a four-inch diameter hole saw which allows three-inch diameter pipe to pass through at an angle. It is hidden in the photo, but I also increased the depth of the sump pit by three (3) inches and then filled that space with pea gravel. The area around the plastic box was also packed with gravel. This was wet, unpleasant work, and Amy Sheep was sadly not on hand to provide any cups of tea or bacon sandwiches.


This is later after the drainage pipe which runs alongside the garage was installed in the trench and connected to the sump pit:


Time to backfill the trenches with more gravel: 


By the end of Tuesday, the far and is completely backfilled...


And the other side is close. I need to build or reconfigure the timber boxes to go on top of the sump pit before I can backfill around the sump pump.


Wednesday morning, and there is a smaller but still significant pile of pea gravel in the driveway.

I got started by modifying the wood box which now stands on top of the plastic sump pit. 


And backfilled with more pea gravel.


The bottom of the sump pit is more than eighteen (18) inches below the top of the concrete floor.

The discharge line terminates in front of the garage. It is angled outwards so that splashing against the vehicle door is minimized.


I had a few barras of gravel left over which I used to fill the low points in the dirt/rock. The gravel was wet when it was spread out. After it dries, I will be monitoring this area for any evidence of water intrusion, at least until after the next rain.  I need to be sure my drainage system is adequate before I cover it with concrete.


I still had plenty of my day left, so I went back to working on the second storage platform. I had to cut the slats from 2" x 4" lumber with my circular saw because the antique Craftsman table saw I've had for the last fifteen years died halfway through the first slat. I decided to see this as a positive, because now I can scrap the table saw guilt free instead of spending time trying to find an alternative home for it when my cabinet saw arrives.


This is how the platform looks all finished, with carpet installed and the first few boxes in situ. This new found storage space was the excuse I have been looking for to declutter the workshop - this area has been filled with everything that used to be on the original platform or stashed in the part of the basement we have been excavating. 


This is the main shop space after a long overdue cleanup:


This is the other side of the shop. This is still some junk to get rid of from here, but a few hours ago...


...it looked like this:


I moved tut pillar dill into the space the table saw vacated and modified my saw table to temporarily hold the miter saw. 


This is the space where the drill press used to be. I will building a miter saw station in front of the cinder block wall in due course.


This is the trash pile that stared off with the old table saw. This area will obviously have to be emptied out before we can pour concrete. If you're wondering, my sparkly new cabinet saw will be going here once the floor is finished.

Coming soon: Pouring the concrete floor!