It's the week before the week before Christmas, and I've got the Tuesday and Wednesday off work to plug away at the basement project. The first day began bright and early with a delivery of two (2) yards of pea gravel to my driveway.
It is noteworthy that while Tuesday was a beautiful sunny day, it had rained quite hard for the two previous days. In a way, this was very timely because it provided a nice test of my drainage channels. Standing water made testing the slope, and removing any minor blockages much easier, but also a lot messier.
The area around the sump pump was particularly unpleasant to work in. However, it did become apparent that the pressure treated box around the pump actually slows the pump down a lot. See below for how this problem was solved.
The first order of business was to extend the main drainage channel into the corner where we just got finished with the perimeter.
Once that was done, I installed a couple of inches of pea gravel in the trench and wiggled the pipe around until I had the slope I wanted. The holes you can see in the pipe actually go to the bottom at the final install.
The second section of the pipe was installed in the same way:
The solution was a plastic box which I spent a good twenty minutes riddling with ¼ inch diameter holes. The inlet hole for the primary drainage pipe was cut with a four-inch diameter hole saw which allows three-inch diameter pipe to pass through at an angle. It is hidden in the photo, but I also increased the depth of the sump pit by three (3) inches and then filled that space with pea gravel. The area around the plastic box was also packed with gravel. This was wet, unpleasant work, and Amy Sheep was sadly not on hand to provide any cups of tea or bacon sandwiches.
This is later after the drainage pipe which runs alongside the garage was installed in the trench and connected to the sump pit:
Time to backfill the trenches with more gravel:
By the end of Tuesday, the far and is completely backfilled...
And the other side is close. I need to build or reconfigure the timber boxes to go on top of the sump pit before I can backfill around the sump pump.
Wednesday morning, and there is a smaller but still significant pile of pea gravel in the driveway.
I got started by modifying the wood box which now stands on top of the plastic sump pit.
And backfilled with more pea gravel.
The bottom of the sump pit is more than eighteen (18) inches below the top of the concrete floor.
The discharge line terminates in front of the garage. It is angled outwards so that splashing against the vehicle door is minimized.
I had a few barras of gravel left over which I used to fill the low points in the dirt/rock. The gravel was wet when it was spread out. After it dries, I will be monitoring this area for any evidence of water intrusion, at least until after the next rain. I need to be sure my drainage system is adequate before I cover it with concrete.
I still had plenty of my day left, so I went back to working on the second storage platform. I had to cut the slats from 2" x 4" lumber with my circular saw because the antique Craftsman table saw I've had for the last fifteen years died halfway through the first slat. I decided to see this as a positive, because now I can scrap the table saw guilt free instead of spending time trying to find an alternative home for it when my cabinet saw arrives.
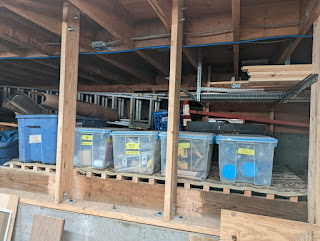
This is how the platform looks all finished, with carpet installed and the first few boxes in situ. This new found storage space was the excuse I have been looking for to declutter the workshop - this area has been filled with everything that used to be on the original platform or stashed in the part of the basement we have been excavating.
This is the main shop space after a long overdue cleanup:
This is the other side of the shop. This is still some junk to get rid of from here, but a few hours ago...
...it looked like this:
I moved tut pillar dill into the space the table saw vacated and modified my saw table to temporarily hold the miter saw.
This is the space where the drill press used to be. I will building a miter saw station in front of the cinder block wall in due course.
This is the trash pile that stared off with the old table saw. This area will obviously have to be emptied out before we can pour concrete. If you're wondering, my sparkly new cabinet saw will be going here once the floor is finished.
Coming soon: Pouring the concrete floor!


No comments:
Post a Comment