I mentioned a few posts ago that we had settled into a routine of digging and then pouring sections of the perimeter. I don't think I explained what we have been doing with the dirt. The answer is that since we filled up the first ten cubic yard dumpster, most of the dirt we've removed has been dumped in the front yard. This has a couple of disadvantages: ultimately this dirt will have to be moved again when we do get a dumpster, and our front yard is now overflowing with small pieces of rock. You might think this meant we needed another dumpster, but I had what I though was a better idea.
An idea that consisted of piling dirt into buckets and...
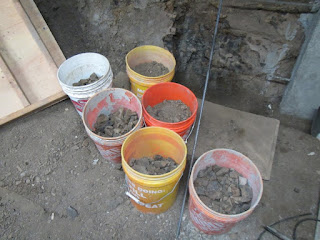
...tossing it into the huge void below the entry porch:

Several sections of the perimeter were thus constructed:


In spite of our plan to attack the perimeter from both sides, we never did pour two sections on the same weekend - pouring one section was quite an effort. Instead, I devoted any leftover energy to working on the floor. This process consists of carving out sections of the dirt, constructing perimeter forms, and installing rebar....

There are several reasons why we are pouring the floor in sections instead of a monolithic slab like Odell would do. Obviously we don't have a concrete truck, a pump and a four man person crew, but also this allows us to pour slabs without control joints: the junctions between the sections fulfill this requirement. I'm using a half-inch round-over trowel at the perimeter of each section, so this leaves a deep grove at the junctions.

Quite a bit of thought went into the placement of the "grooves" because I want the finished look to be visually appealing. The plan is for the 32 inch wide section shown above to extend up to the garage doorway and form a pathway, and for the perpendicular joints to align with the pre-existing shelves. This leads to a 3x3 array where the bottom left section is occupied by the chimney, and the path above extends across the top right and middle right segments:

Once the forms were built and leveled, I installed rebar and applied bonding agent to any bits of older adjacent concrete. The rebar extends through the timber forms so that it can the connected to the next section of the slab in due course.

The way the forms were constructed means that the timber occupies space in an adjacent section - in other words, I couldn't pour concrete in two adjacent areas at the same time.

After spending quite a while on setup, I was able, with help from Amy Sheep, to pour three sections of the floor in one go.

It's a bit more obvious which sections in the photo below, which was taken after the concrete has mostly cured:

To be continued....


No comments:
Post a Comment