Monday, June 24, 2019

Raised Beds

This project has been a battle against the elements. It all started by at the beginning of February when we picked up a bunch of redwood lumber from out local big-box store. Redwood is more expensive than regular lumber, but it has a natural high tolerance to fungus and dry rot etc. Using chemically treated rot-resistant lumber is discouraged for this application because ultimately the chemicals leach into the soil.


We actually assembled the short sides of the planters in the garage because it was raining at the time.


After lunch it brightened up for a bit and, with help from my apprentice, we got the first planter constructed and roughly installed before the skies re-opened.


This photo was taken a few days later when normal weather had resumed:


What followed was a number of weeks of being too busy or the weather being too wet, but somewhere in between we managed to get the second planter put together and roughly installed.


Fast forward to the beginning of April and with the improving weather we managed to level the second planter, and dig out above the upper planter so we could get our shinny new wheelbarrow around the back. 

my new toy....is a seven foot level. 


The dirt we removed was pilled into the planters:


A couple of weeks later we picked up about 400 cubic yards of top soil and our first batch of plants and this was the result:


Watch this space...

Monday, June 17, 2019

Paint Booth

I wanted to build a small paint booth in the workshop where I could use my airbrush. Most of the paint I use is water-based acrylic, but some of it isn't, and the primer I use is pretty obnoxious. I made a trial booth out of a few scrap pieces of plywood and some masking tape. It was ok, but it wasn't very well vented, and it was a bit dark.


The paint preparation area needed a bit of a re-think as well.


I decided to move the booth into the space next to my bench grinder.


I had to modify the bench in this area, but it is an ideal location because I already installed an overhead LED light, and it is right in front of a ventilation opening.


Mocked-up the new booth - basically the same bits of plywood, but modified to accommodate a standard 20" x 25" furnace air-filter, and with a large opening in the top panel to let the light in.


I took the booth apart and installed a cheap bathroom extractor fan and a short piece of ducting which is routed to the exterior, and then taped over the rest of the vent opening.


I re-built the paint booth around the fan after cutting a suitable opening in the rear panel.


I covered the top of the booth with a sheet of ⅛ inch Plexiglas.


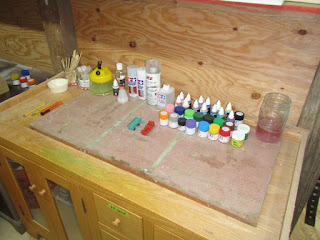
I even managed to sort out the paint prep station.


After a bit of testing, I can confirm it works really well. I can spray whatever paint I like and not smell it anywhere in the house. Yay!


....and the paint prep station is looking a bit more like its old self!


Monday, June 10, 2019

Ruby's Room

Ruby has been exceptionally patient while we worked our way around to her bedroom - we did the boys room right away because it was so urgent....finally it was Ruby's turn.  Once we got all the stuff cleared out, the room looked more bland than ever: the same "prep-for-sale-off-white" we've mostly eradicated elsewhere, and a set of unfinished bookcases that came with the house. We could do much better!


We let Ruby pick her own colors, and then we got to work...


It's a family tradition :)
Came out really nice:


Monday, June 3, 2019

Redwood Drill Press

I wanted a drill press for my workshop. Or "tut' pillar drill" as my grandfather would have called it. Luckily I got one for my birthday! After a LOT of back-and-forth, I ended up with a floor-standing model which can double up as a spindle sander, although I'm not sure if I'll ever really use that feature.

I had to carry the drill press down to the workshop in pieces. I started by putting the column and base together. It wasn't very stable. The manual recommends bolting it to the concrete floor, but I don't want to do that until I'm sure I don't want to move it, and I don't have the tools anyway. 


I think most people would have built a base out of steel, but my go-to material has always been wood. Huh...huh...wood! I got started by gluing up some pieces of scrap redwood lumber that were knocking about innt tut' 'shop. They were leftover from a project I'll be writing about soon.


I put a piece of pine trim around the perimeter - glued and screwed of course - and fastened it to the drill base with a couple of ½ inch bolts. 


Came out very solid. You couldn't knock it down wit' a barge pole. So I went upstairs to empty t' tash pan ;)